
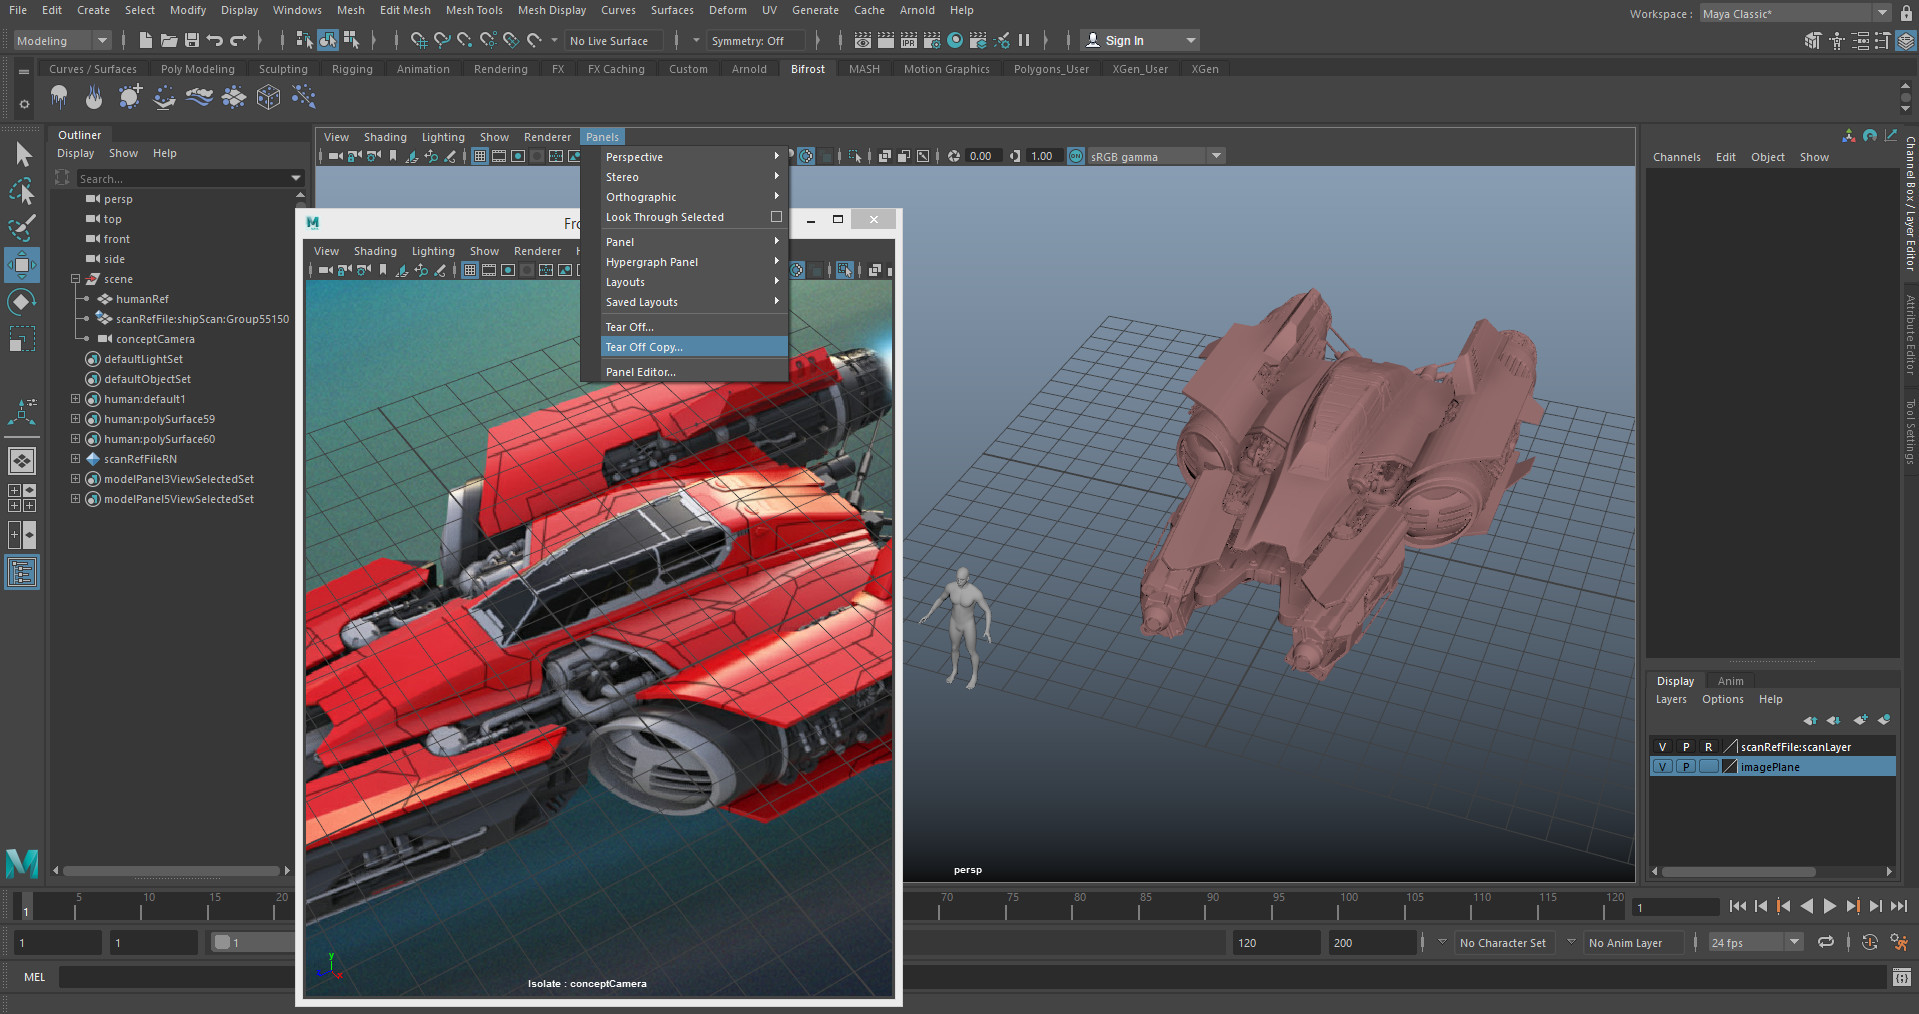
Know How the Asset Will Be Used
Knowing how your asset will be used is the most fundamental crucial part of modeling. It will completely change how you tackle an asset so it is very important to get all the information needed. As we work in a large pipeline and all other departments will be using our work, ask them what they need. Some things to consider are
How close is it seen
Poly or SubD
Seen from what angles
How many shots is it in (watch the previz)
Can I take parts from existing assets
Has someone already done something similar on the show
How long do I have to make it
What corners can be cut without sacrificing quality
Does FX need anything specific
Do I have to make this modular
Is there existing scans or concept models
What reference is available
Will the asset be split among artists
Is any extra design work required
Answering these questions for my own asset. It will be seen close from all angles so I will make it SubD. I have similar pipes and details from my spaceship kit which I can use to speed up the process. Since its at home I can spend as long as I want on it. I don't intend to show the interior cockpit so I can save time there, maybe some basic geometry. There is no FX needs and its a single asset so it doesn't have to be modular. There is an existing concept model I can use as well as concept art. It won't be split among artists as it is just me. It will need some landing gear that wasn't provided by concept so I will have to propose some.
Once you have gathered this information you can start. However things can change on a daily basis so its best to keep in mind that the above statement may change over time. Suddenly the director could decide he wants to blow up my ship and halfway through modelling, we now need to consider making it FX ready.
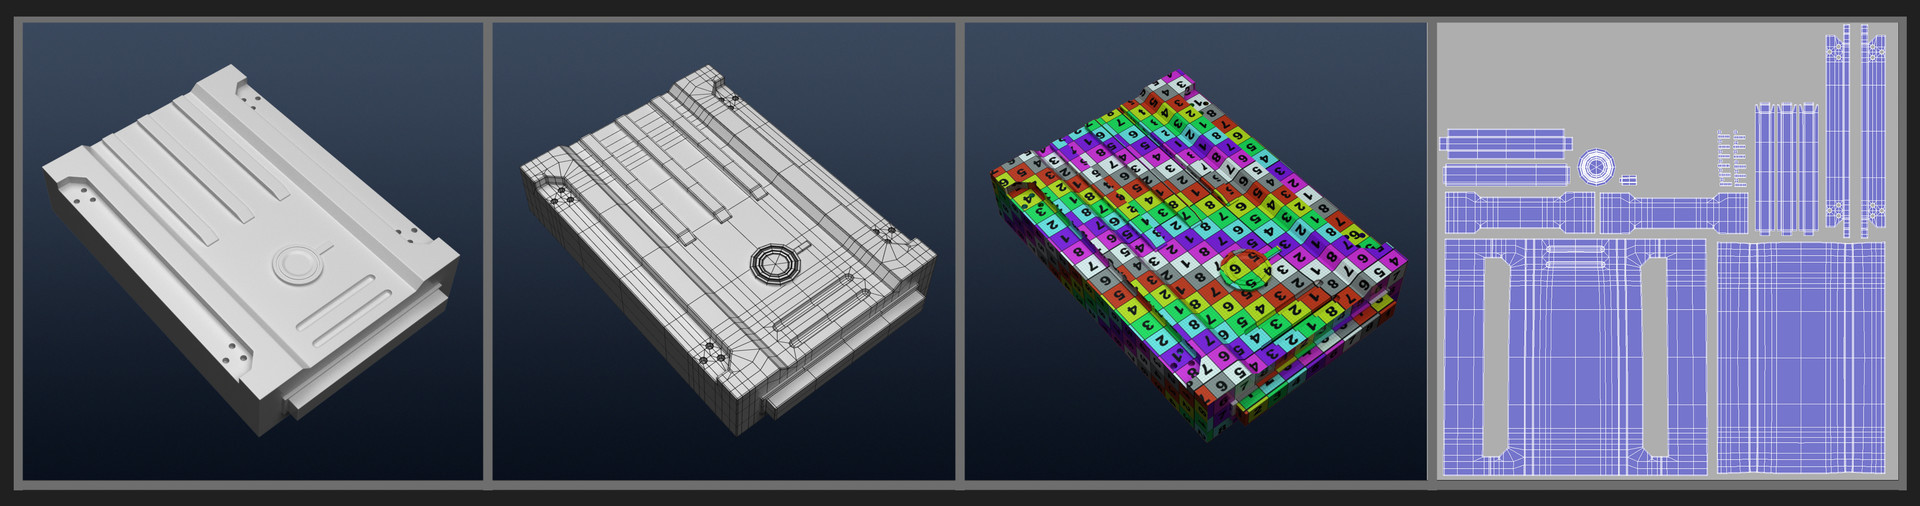
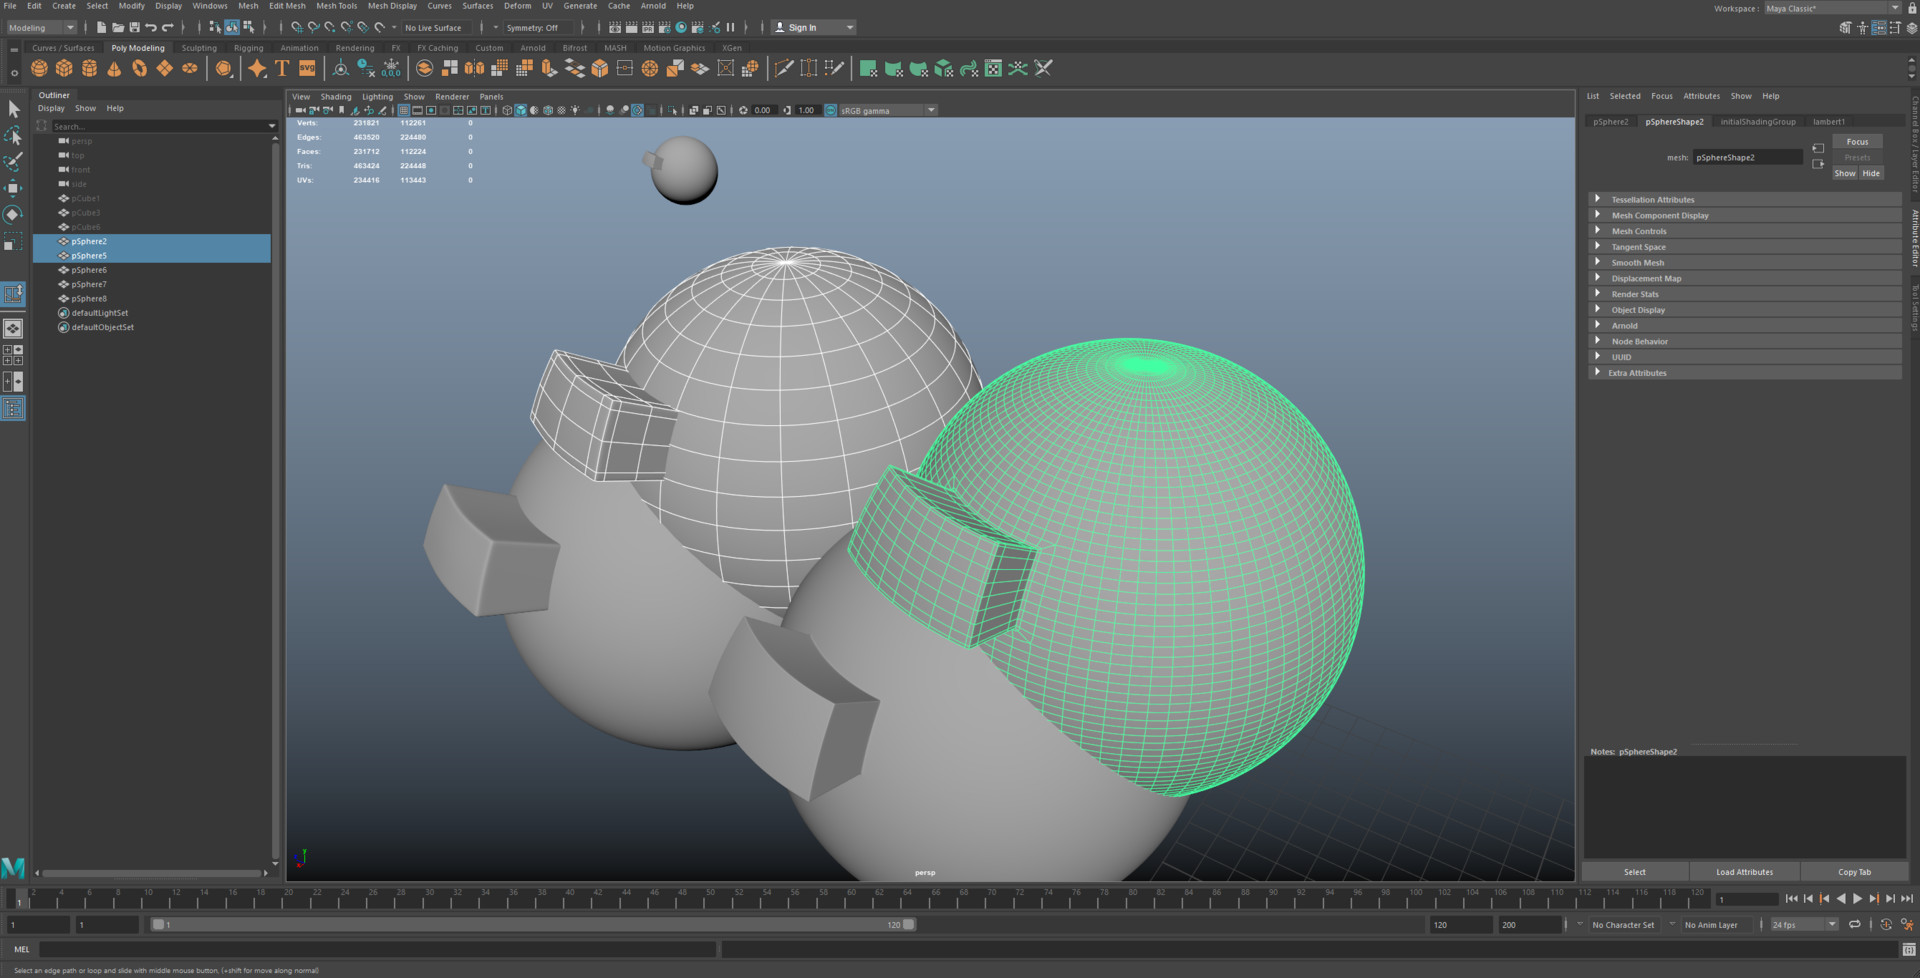
Poly, SubD (triple edge) or SubD (Creasing)
Based on the above info, the first thing to decide is if the asset will be Sub D or Poly. There is a fundamental difference between the two. Sub D is used for hero work with some mid ground depending on what it is. Poly is used for background and maybe some mid ground environment work.
-Poly is what it is, you get what you see at render time and displacement can not be used.
-Sub D everything is subdivided at render time so you need to use methods to prevent your shape collapsing and keep the forms you want to have. There are two main ways of doing this.
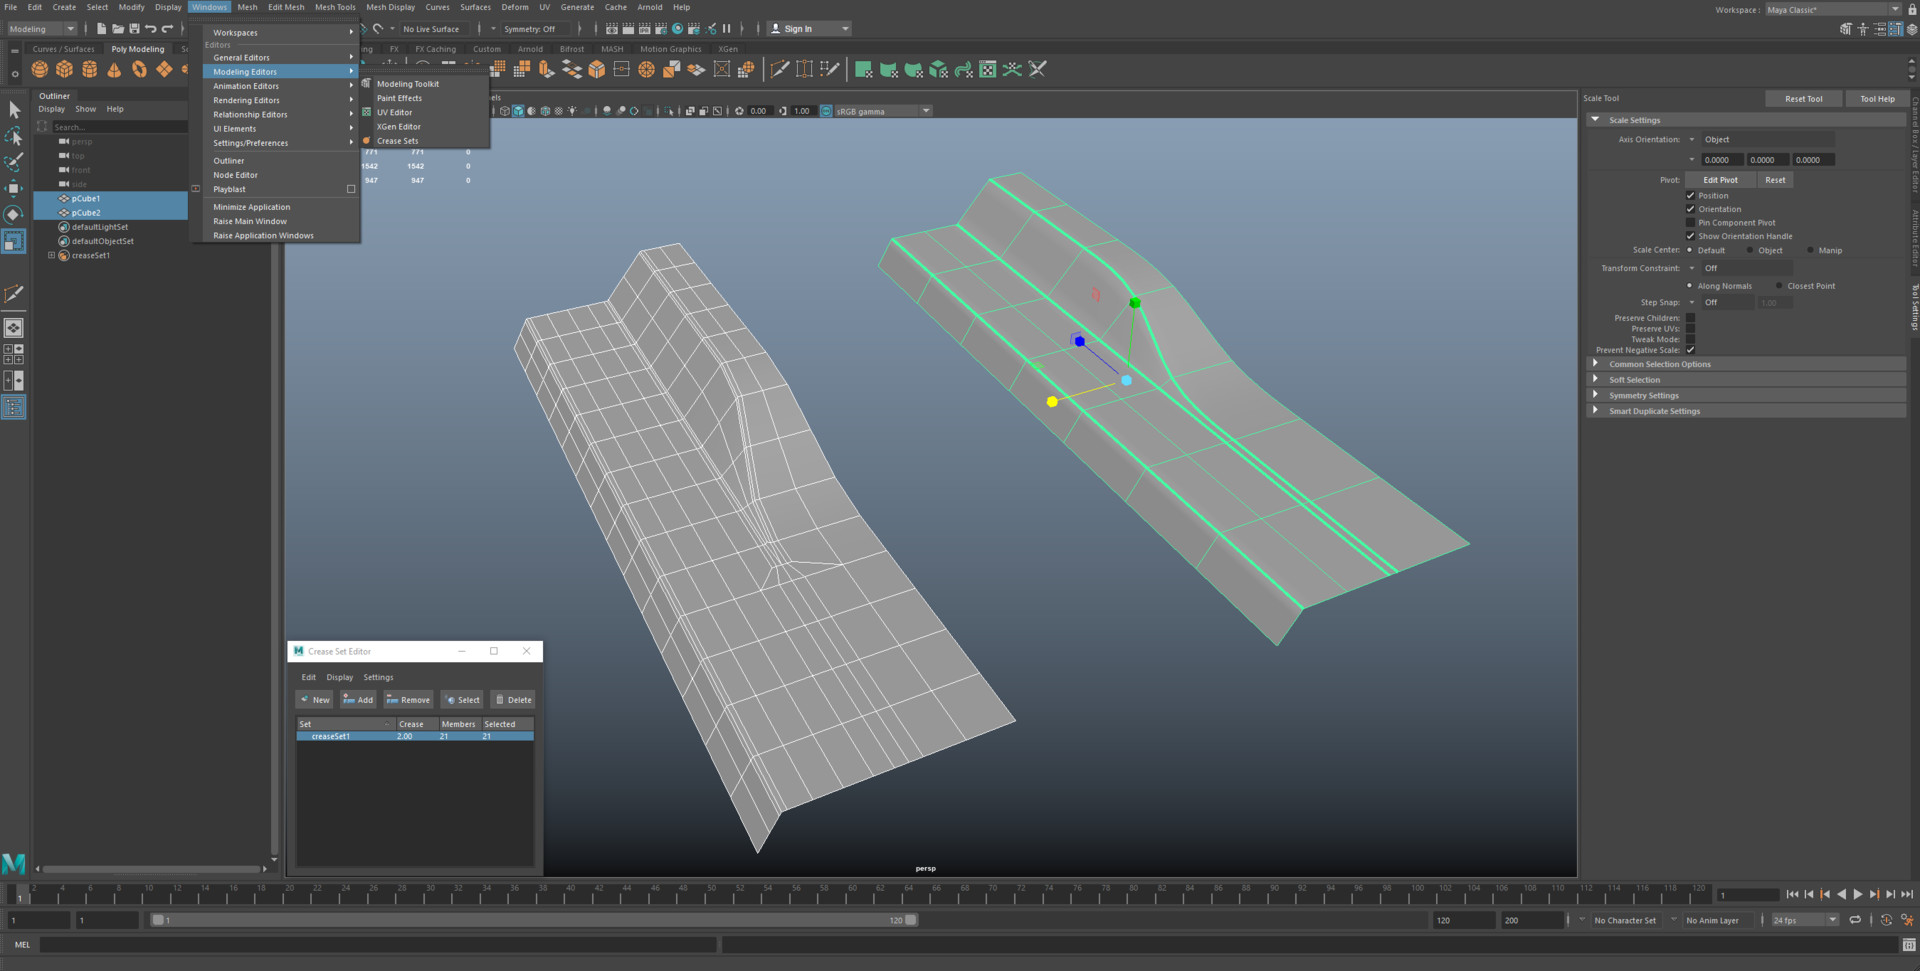
The main method which I personally advise you do is called triple edge or fencing. What happens when you subdivide is it multiplies every polygon and collapses them so to make the shapes collapse in the way you want, you add edge loops closer together to hold sharper lines and the spread of the polygons is much closer in those areas. This is the most useful and reliable way of holding shapes.
The other method of holding shapes is creasing which is where you use the crease tool to apply a value of hardness to an edge to mimic the above method without the extra edge loops. To add creasing go Windows > Relationship Editors > Crease Sets In Maya 2016, i think its different in 2018. You just go New and set the value you want between 1 and 10. 1 being soft and 10 being hard. The default is 2. I usually use 2 or 4 but honestly I am not fond of it. Firstly it can be quite unstable like if you take the asset out of the program you may lose the creasing and you definitely cannot take it out as an obj. Another problem is you need to subdivide it to level 4 to get an accurate representation of the creasing and you need to add extra edge loops to support the crease anyway so I don't think it really saves much on the poly count. I have also experienced many different bugs using creasing so personally I would stay away from it and use the Triple edge method
You can see with both the above examples, at Sub D level 2 the triple edge still looks decent but the creased version has black edges. To get rid of this you will need to take the creased models to sub D level 4.
Sub D and UVs
I won't talk too much about UVs but something that should be mentioned is that when geometry is subdivided, the UVs will also move. To prevent this as much as you can you just add more supporting edges to prevent the texture from sliding too much. My production kit I am selling which can be found here ( https://www.artstation.com/artwork/ynde5) has decent examples of topology that preserves the mesh UVs.

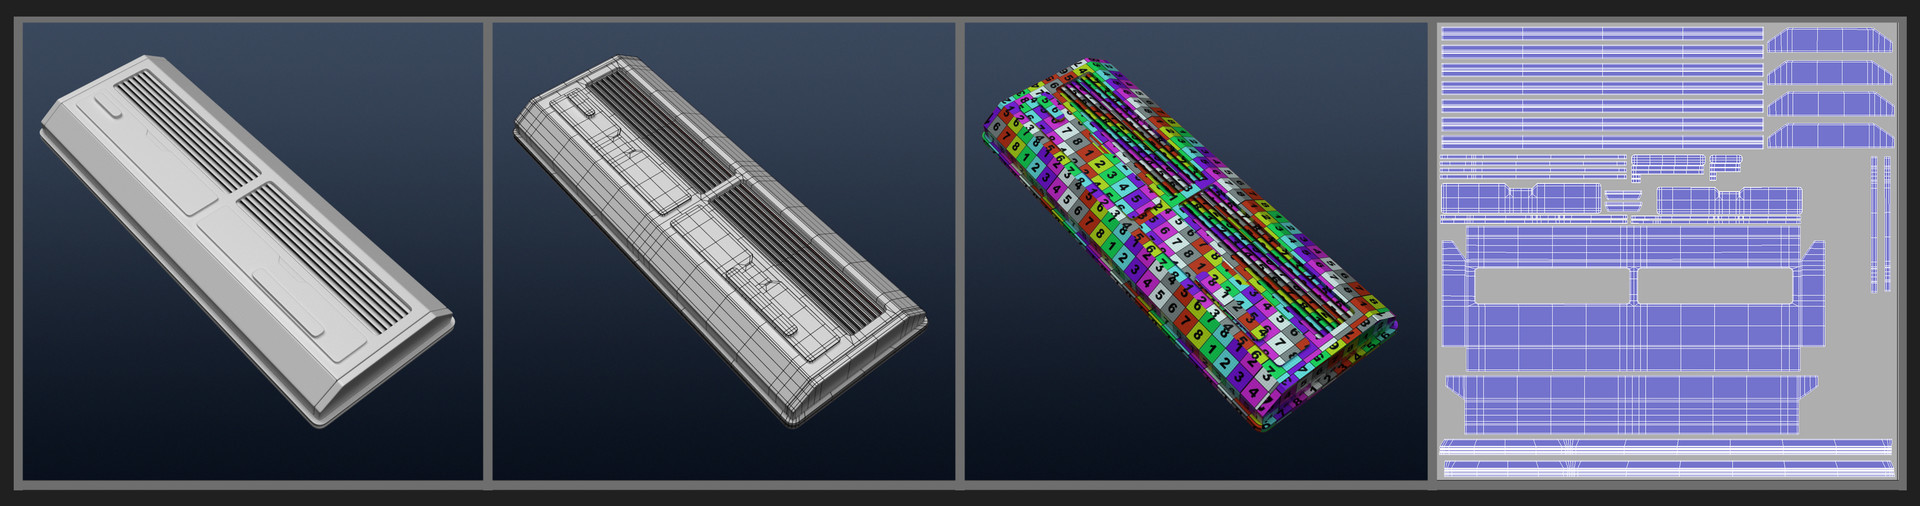
Basic Topology Examples
I have posted quite a few basic topology shapes on my Artstation and Vimeo which I will link here. The reality is even the most complex model shapes can be achieved by breaking down and planning ahead what you will need to do to hold the basic shapes. https://www.artstation.com/artwork/Bl9vk
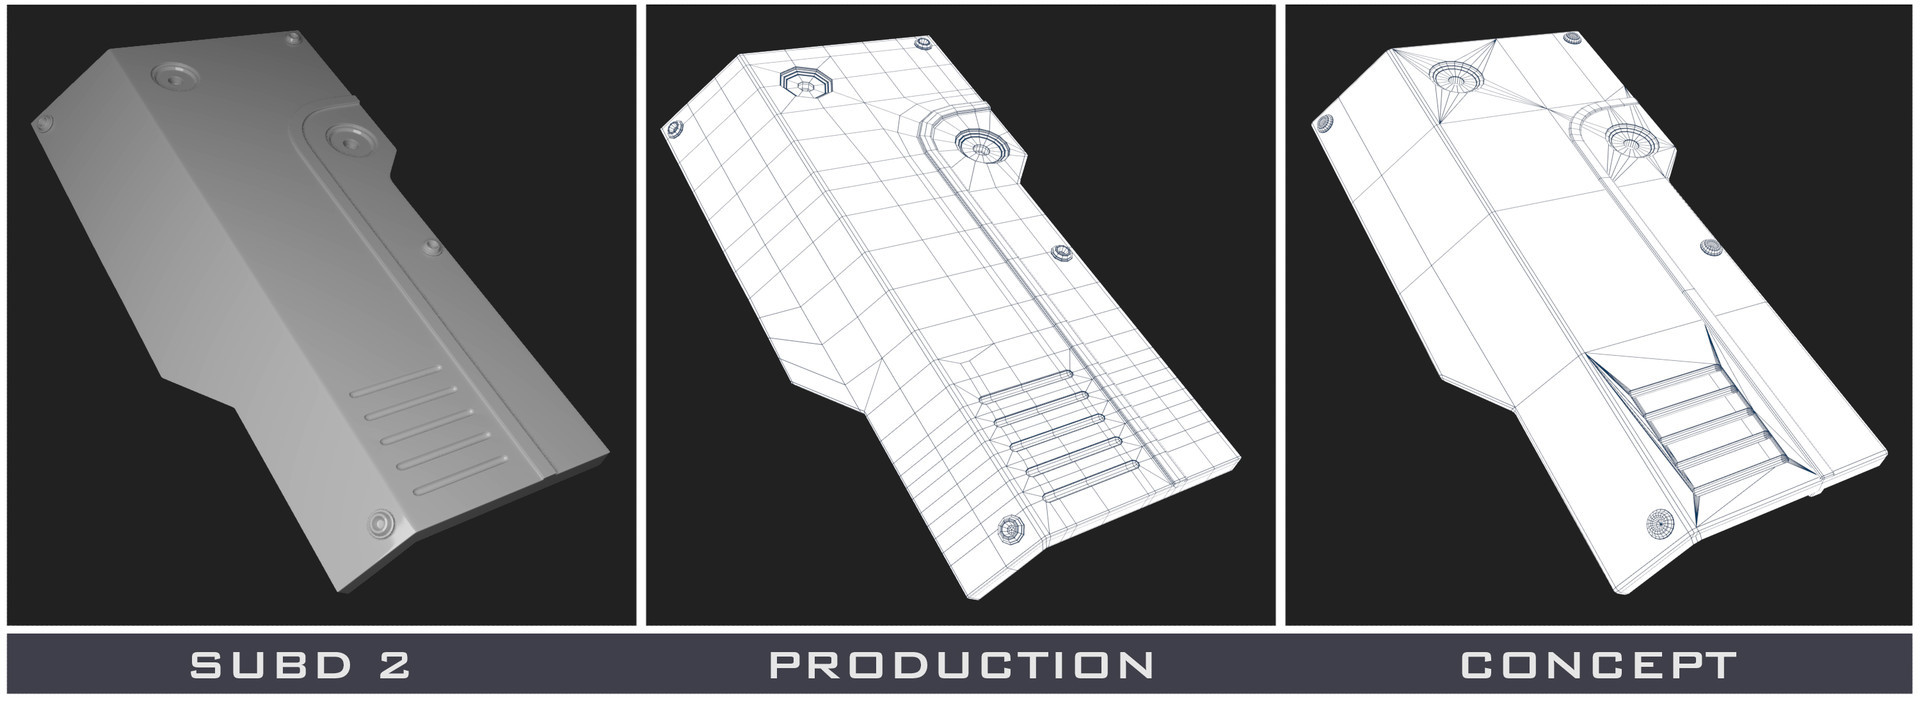
Concept Topology vs SubD Production Topology
I did a post in the past about this so I will be linking it here https://www.artstation.com/artwork/mYVE1
The biggest difference between a concept and production mesh is how clean the production mesh is and how fast the concept mesh is.
With Concept the quality of the topology doesn't matter at all as long as you get the shapes you want. This means you can just hack together and boolean shapes as you please. Most likely no one else will be picking it up after you and its just for still renders.
A sub D production mesh takes MUCH MUCH longer to make as you have to plan out ahead and work out the flow of topology correctly as it will be Subdivided at render time. A few standard rules to Fencing or Triple edging a mesh is.
Creasing Still Has its Uses
I know I talked about how I don't trust creasing above as a production method but it is still extremely handy as a tool itself and I use it quite a lot while modelling. The main way I use the crease tool is I will build basic shapes and preview them smoothed by pressing 3. With the creasing tool you can crease edges and play with shape flow very fast and it is great for concepting organic lines and forms. Once I am happy with the shape I will subdivide it to create my new base geometry and then will triple edge my finished form. Don't forget to remove the crease after and press 1 to turn off preview smooth. You can see where a crease is from the bright green line.
Modeling on Curved Surfaces
This is something that comes up quite a lot and people are always searching for a magical topology flow to prevent pinching on curved surfaces. The reality is there isn't one and you will always get a pinch. What it comes down to though is how much you can hide the pinch depending on how close you can see it. If your curved surface is very hero, you simply just need more topology on the curved surface to make the pinch smaller. That is it. If the shape is much further away the pinch wont matter so much. You might not even have to model out of the curved surface and can simply penetrate 2 shapes. I would do this if you can.
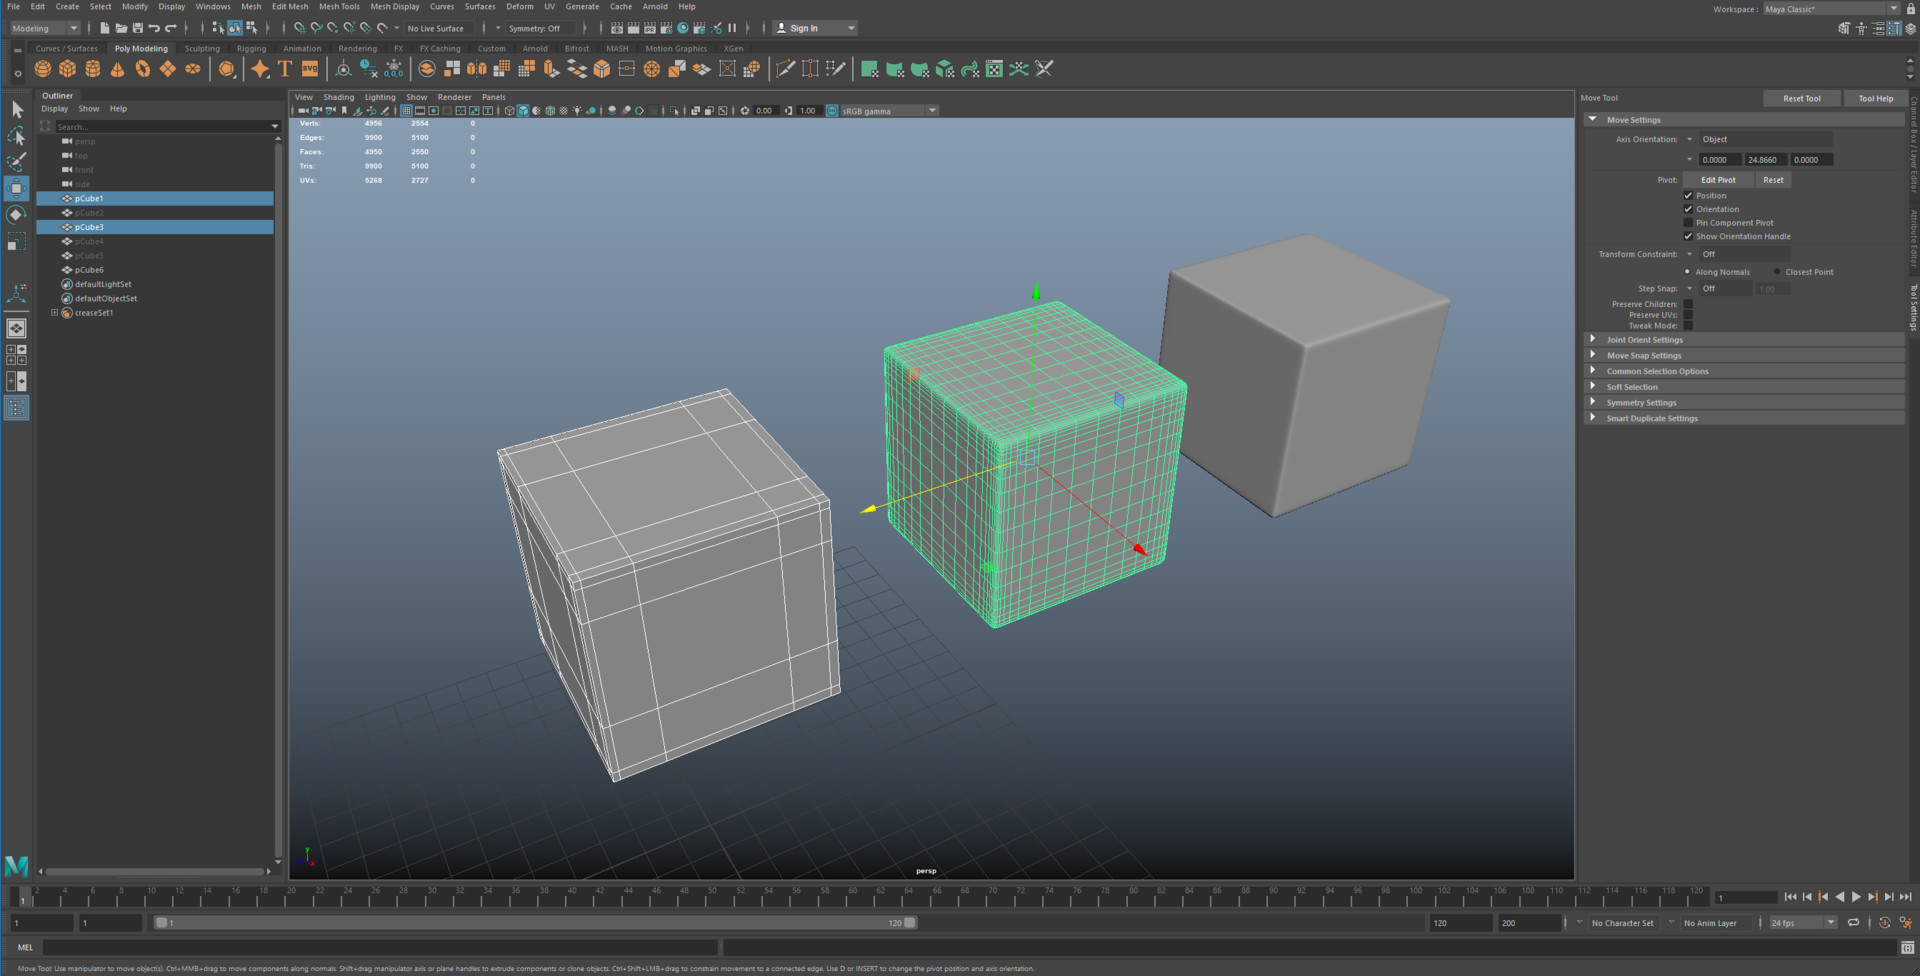
Model as One Object or Two?
This depends entirely on how close your object is seen. If it is a hero object that is being built SubD then it is best to copy how it is in real life as it will have subtle bevels and curves. If it is a more mid to background asset though you can usually fake this sort of thing and just combine 2 separate objects. You can see below that the shape made with Two objects is missing that nice really subtle bevel where it transitions between shapes. However when the same shape is seen far away it doesn't matter anymore and can just be cheated.
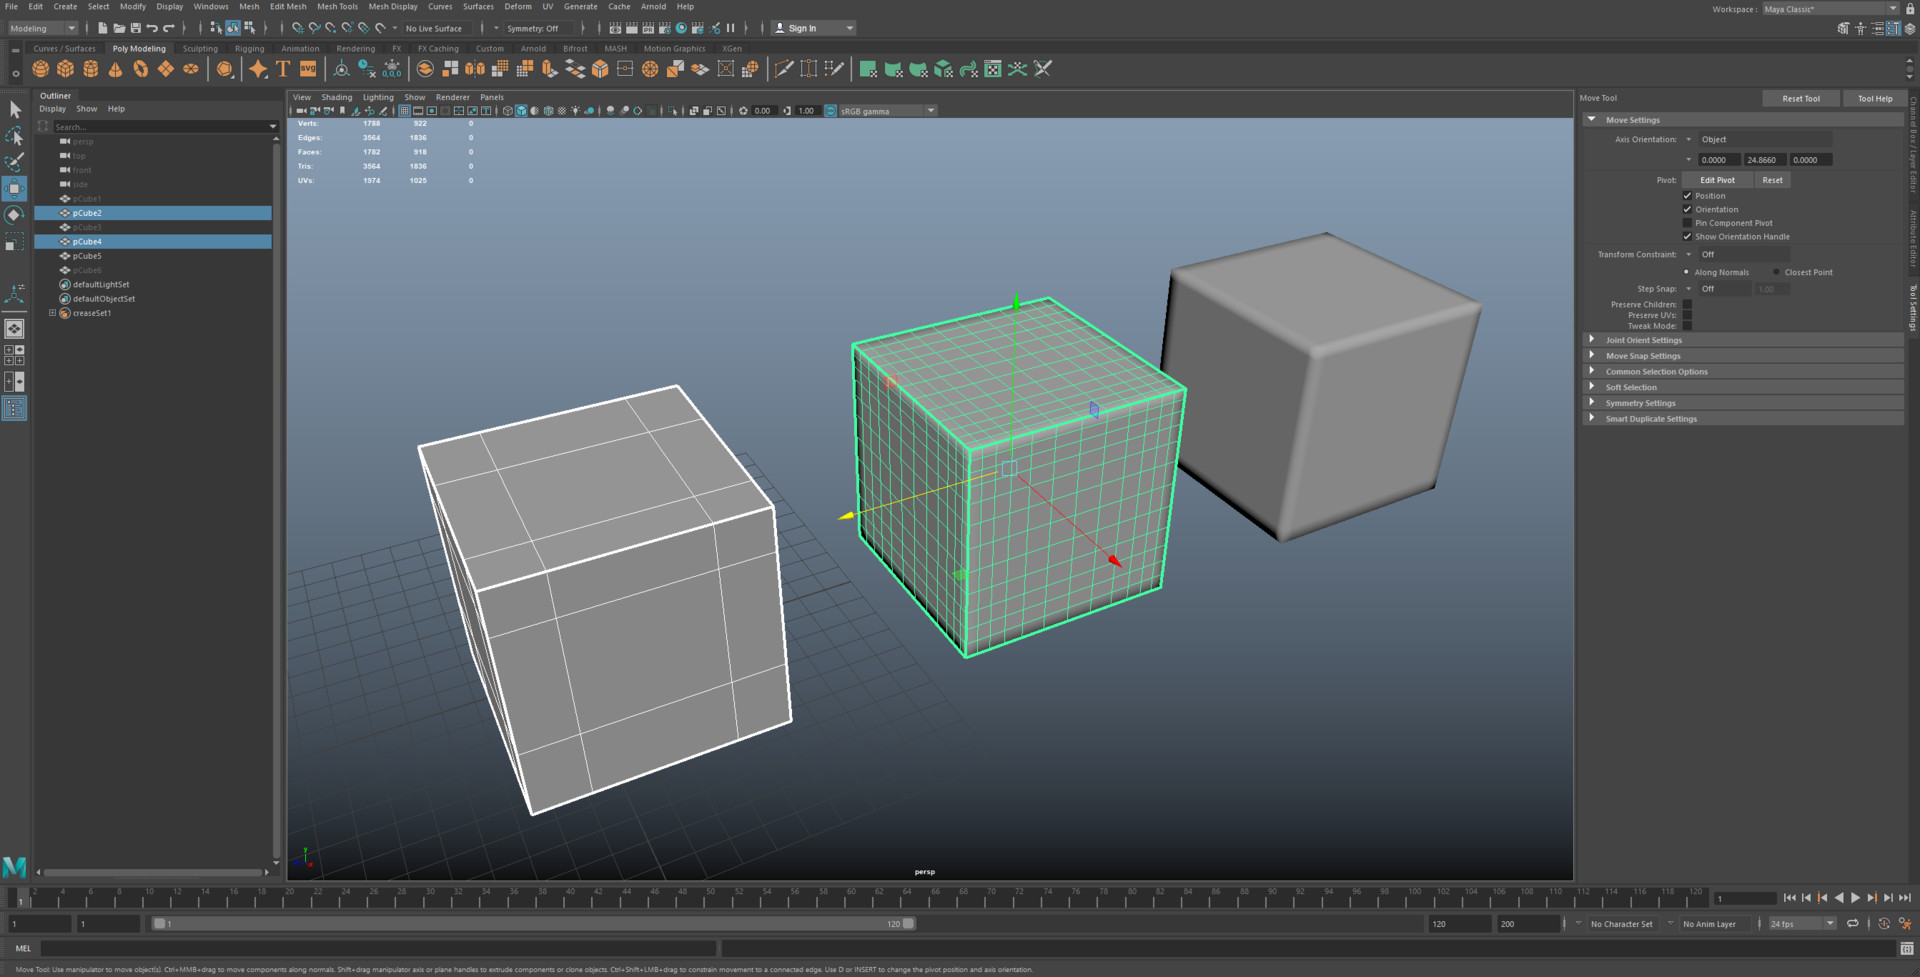
Combining Objects, When To and Not To.
Combining objects can be very useful when organizing your scene and can speed up time working within the pipeline as there are less objects that need to be processed. You can't just go combining everything though, there are a few things to consider.
Firstly will this in anyway make it impossible to be rigged and animated. A pretty straightforward example of this is if you combine all the geometry of a robotic leg, it obviously can't be rigged or move how it needs to. Same goes for if say you combine just all of bolts or pipes on a leg. If the knee bends it will take all of the upper leg bolt parts with it.
The second most important thing is that you should stay away combining things which are different materials. It isn't as pipeline breaking as the topic mentioned above but it does make everyone's lives easier if you don't combine things with different materials . This makes selections easier for texture artists and also enables a lot more control in look dev. Keeping materials separate also helps with your naming convention as say for example you put a G for glass. You are able to search for your material convention and select all of the glass. Also depending on the studio you may need to check in your asset with a shader for each material. What do you do now if you have a glass piece combined with some metal. It could get confusing for everyone.
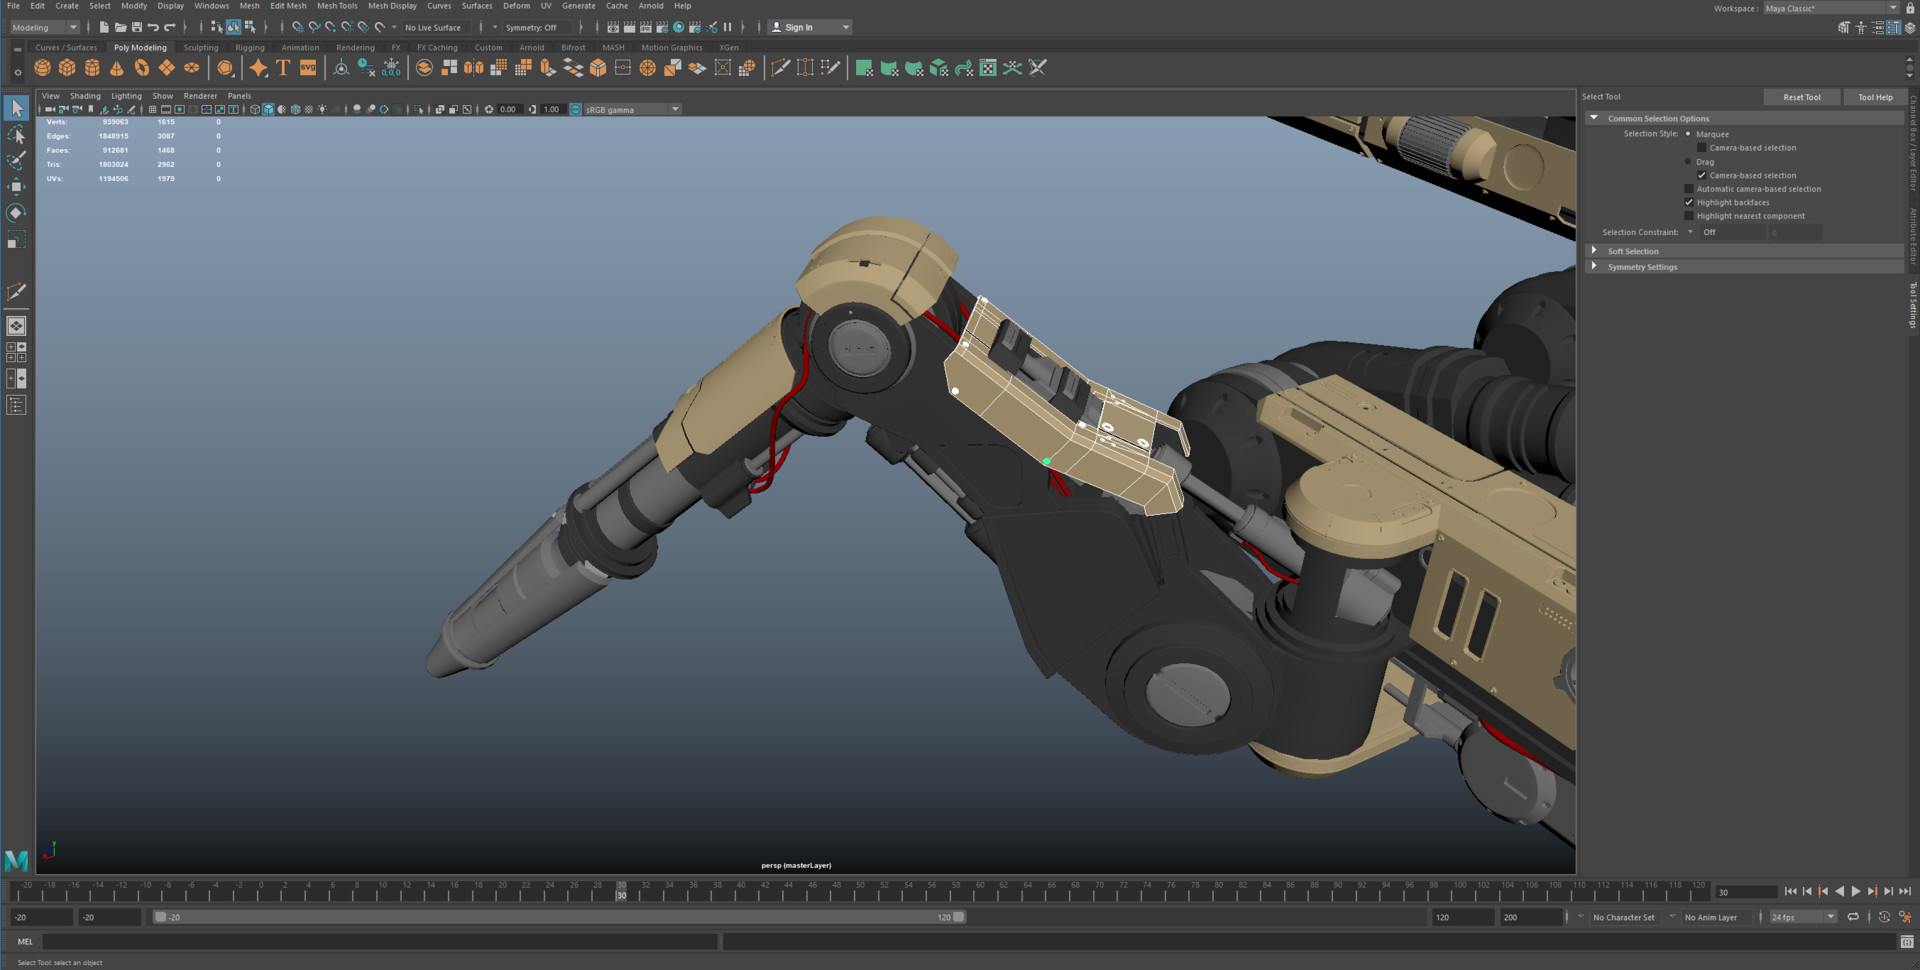
Taking both of these in to consideration in the image below with my mech. I can combine the selected Geometry as the bolts and the panel parts will all be same material and they wont get in the way of rigging or animation.
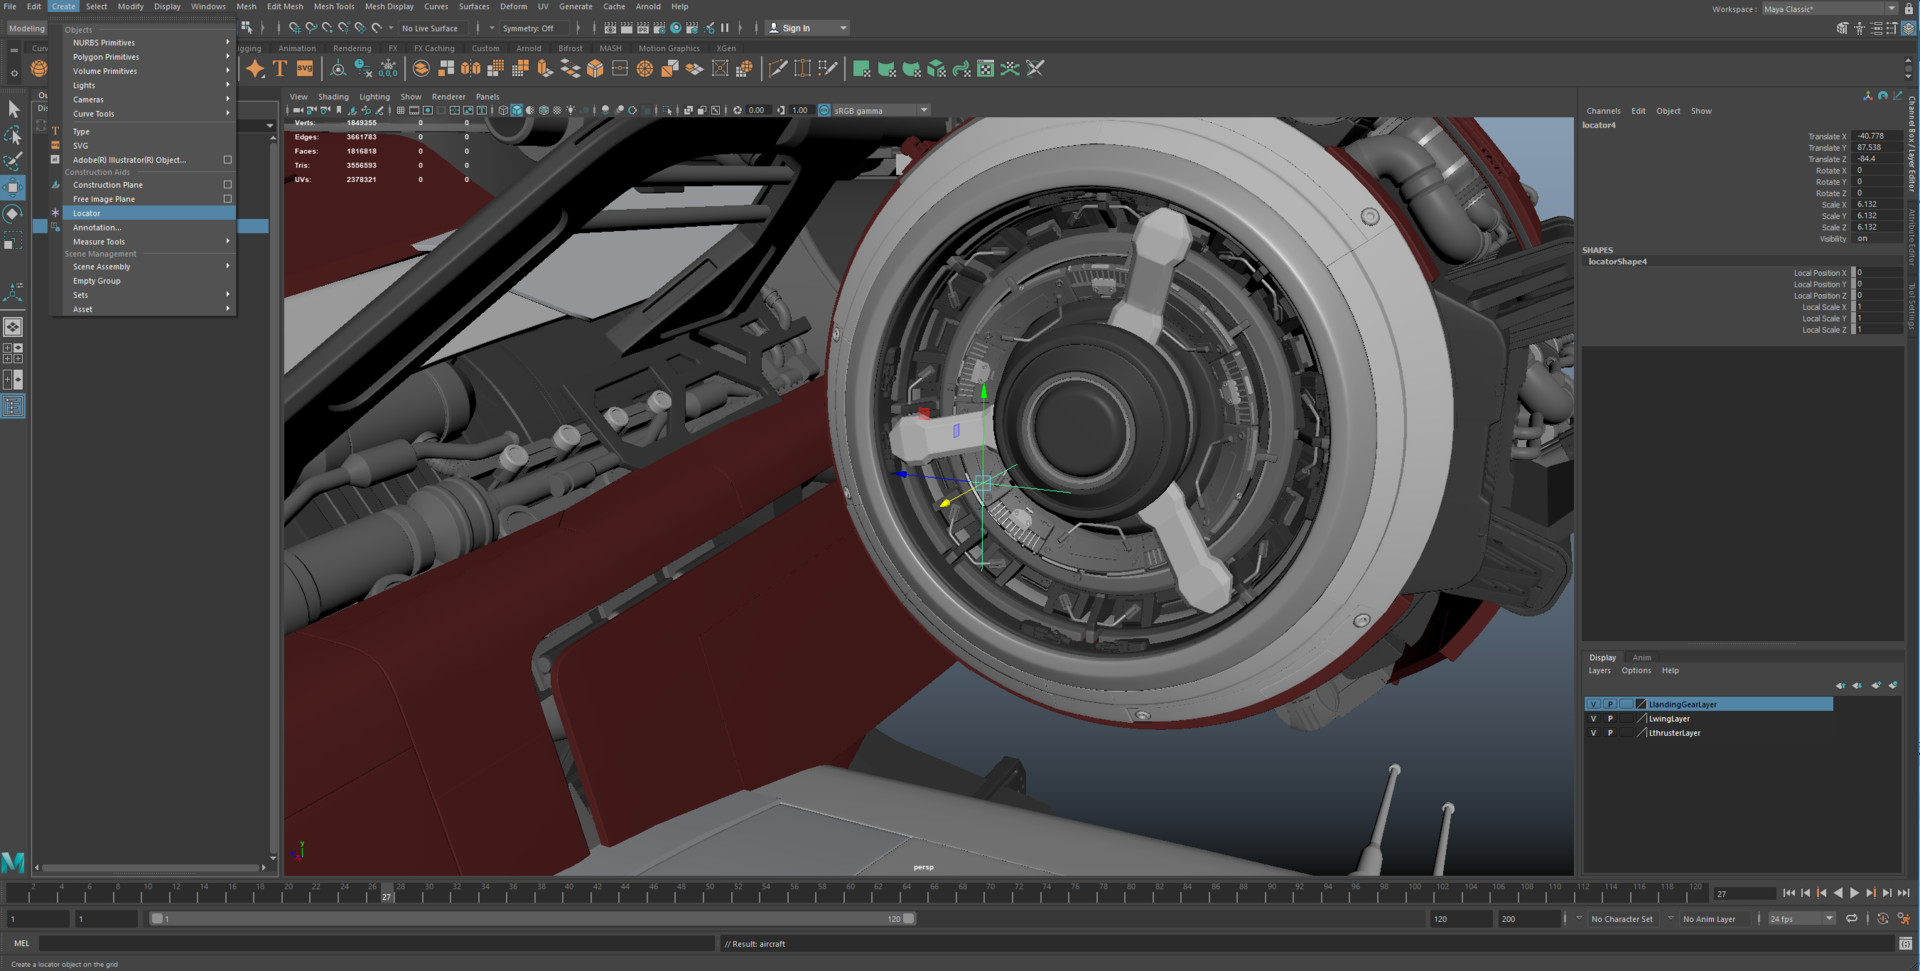
Using Locators
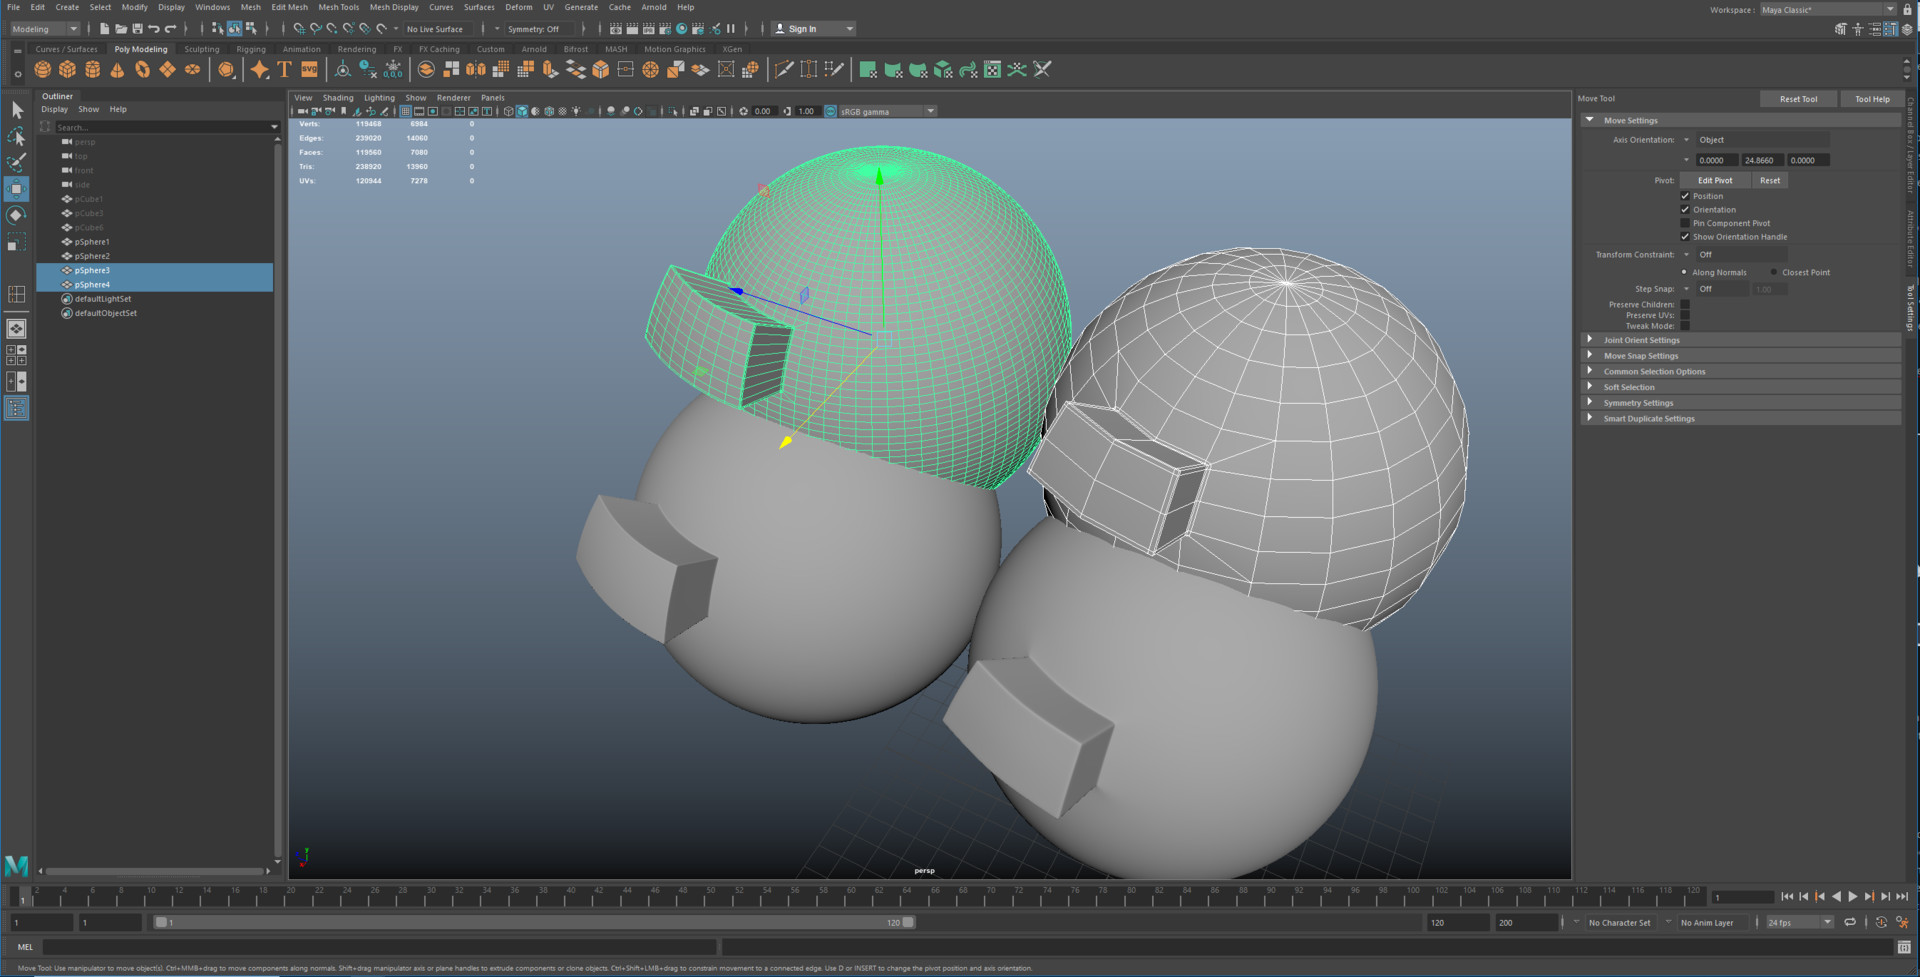
A locator is pretty much just a point in 3D space that you can create. They can be very handy for just marking places you want to consistently snap objects to. My main use for locators is if I need to duplicate in a radial way, like an engine or a circular building. I find where the center point is of my cylinder and snap my locator to it. Now I don't need the center geo from the cylinder and now I will have a consistent center of the cylinder no matter what I do to the geo.
Making Panels
The way I personally approach paneling is I will build the basic overall shape of what I need and then cut it up from there. I will subdivide it a few times if i need more topology for the panels. You want the base mesh to roughly match the overall shape when it will be subdivided. It will make it much easier to do the paneling. Once I have my overall shape I just use multi cut to draw the lines I need in to the mesh, extract the faces I need so it is its own object then extrude that object down and triple edge the object. If i don't need the object to be closed I delete the back face.
Once you do that all of the panels will be flush with each other but when smoothed you will see subtle breakup and bevels where the panels are. I find it very handy having the panels as separate objects, that means I can manually alter each without breaking things around it. You can always just combine the objects at the end. I have shown this method in the video below. If the topology of the individual panel is quite specific I will do the topology before I extract the face. It helps a lot if the topology of each panel flows in to the next but not fundamental if when smoothed it still looks fine. It is just handy on very curved surfaces.
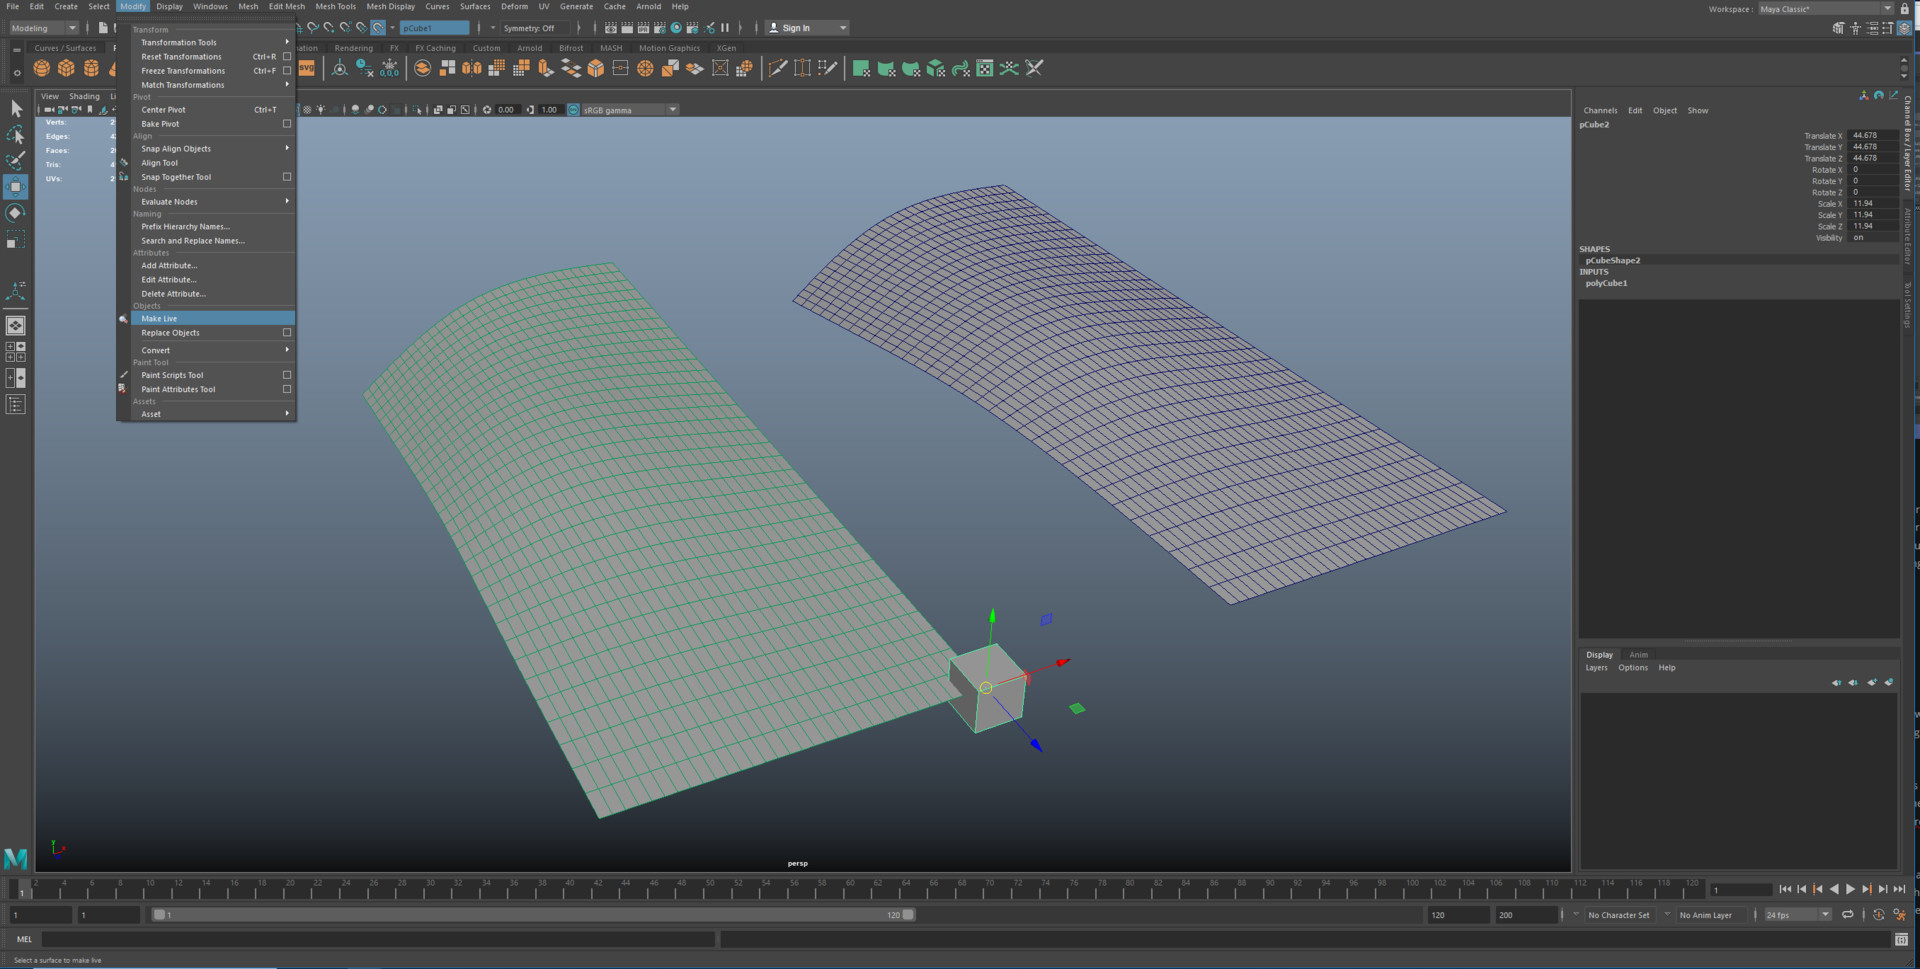
Make Live
Make Live is a handy tool which enables you to use a selected piece of geo as a guide that will snap any verts, edges, faces or even objects to if you try to move them. It can be found in Modify > Make Live. This can be very useful when retopologizing a scan using the quad draw tool as you can literally draw your polygons across the object. Another useful example of make live is say you were modelling across a curved surface, like a wing or something. You model the base shape of the wing and subdivide it several times then Make it live. As you are modelling your panels it will snap along the curve of the wing. In the example below I have shown what a Live object looks like, it will be green and you will notice the middle of the transpose tool will have a yellow circle, this lets you know it is snapping. When it is snapping you literally wont be able to move the object off the surface, no matter how much I pull to the right, the cube will stay on the very edge of the live mesh. Once an object is live you cant select it in the viewport, you need to select it in the outliner.
General idea of an FX mesh or making your asset FX ready
As our models are used throughout the pipeline, there sometimes comes very specific needs from the FX department. The two most common things are making our mesh so it can be destroyed by FX, or making a mesh that they can do collisions with, like a boat going through water. An FX mesh will be based entirely on what the FX artists will need and it is always best to talk to them about specifics.
The most general FX mesh rule is all objects must be closed geometry and nothing can intersect within the same object. This means you cant take all of these open objects and combine them together to visually look closed as they wont be. You can however have the same visually looking pieces, cap the insides and leave them as separate models. Usually this model will be the main asset itself, there wont be a separate FX mesh like mentioned below
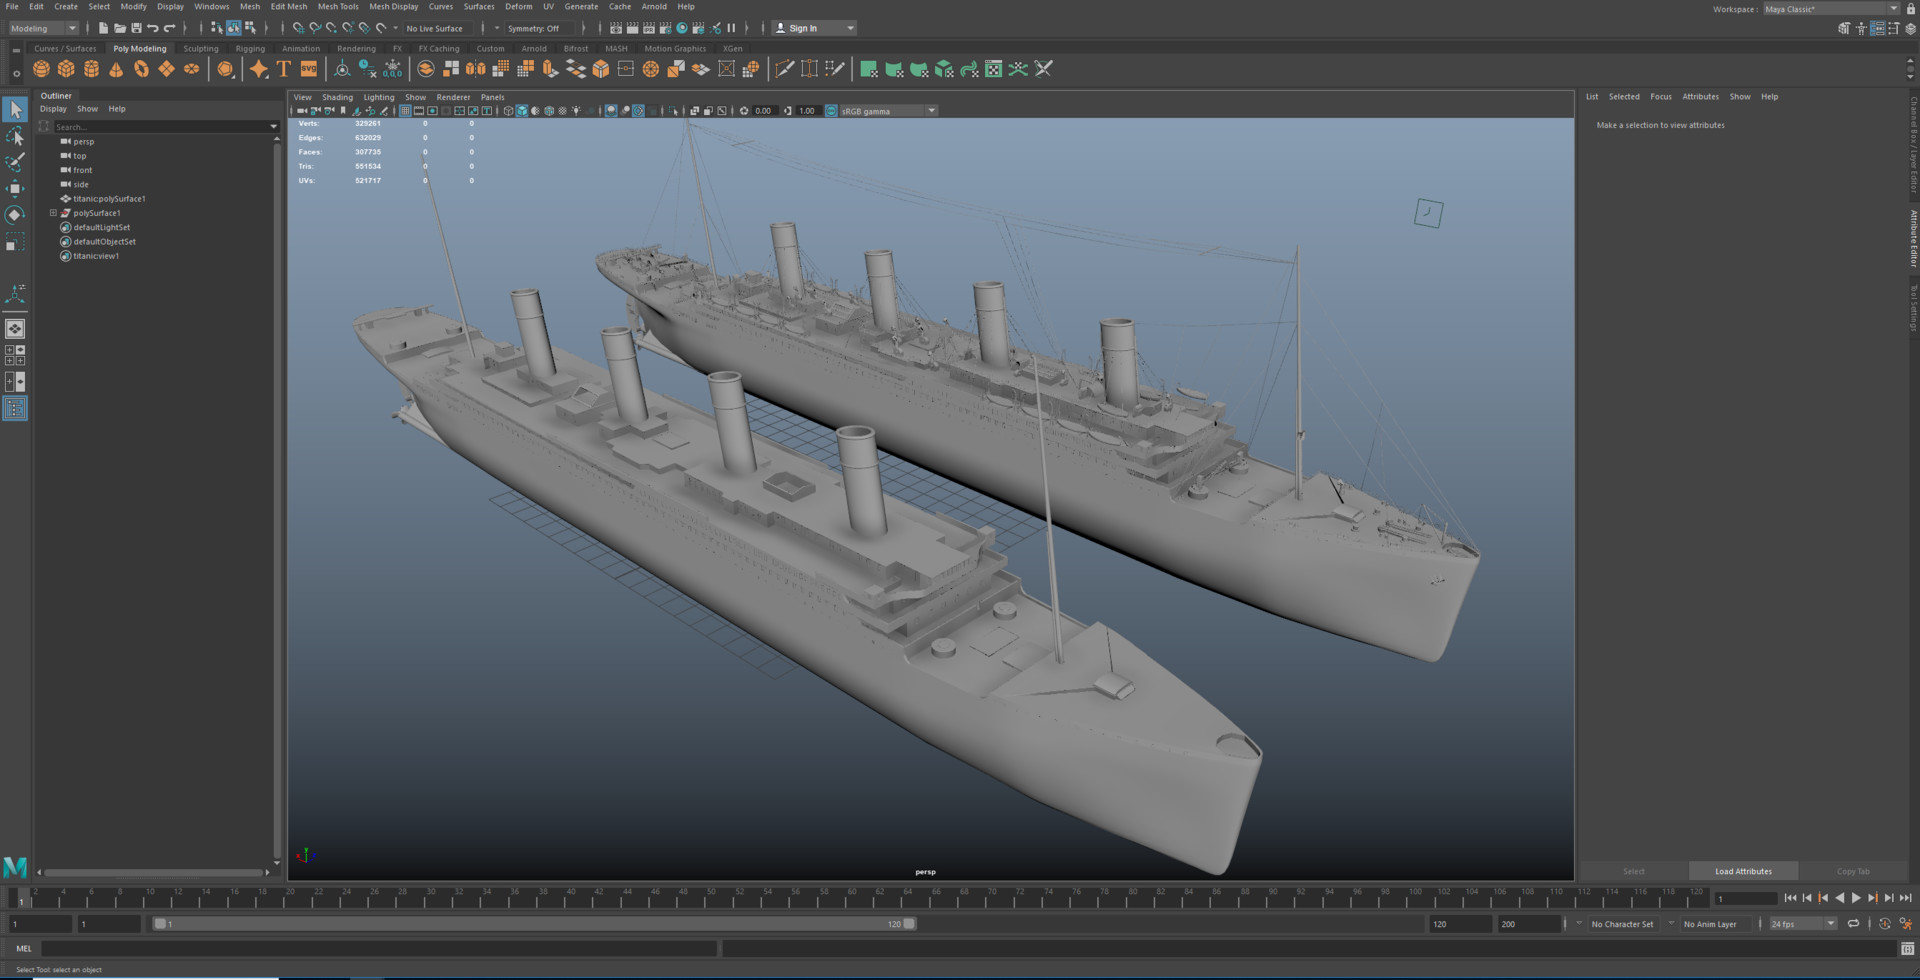
Another common mesh is an FX mesh for simulations and interactions. The same rule applies where objects must be closed and not penetrate but however it only focuses on the main shapes and it is its own separate mesh. This is quite standard for things like ships that have to go through water, a separate version of the hull is made and checked it but is not seen at render time. This means the main asset can be built how it needs and FX will take the FX mesh to do their thing. The only problem is you need to keep the fx mesh up to date with the shape of the main asset.
Hopefully people learn a thing or two from this. These are just my thoughts and my standard practice at work. Any questions just ask below and please spread the word if these sorts of things helped you.