
This blog will mostly about ways to clean up and optimize the Maya scene once you have finished the work. If other people are going to be picking up and using your scene you definitely don't want to leave things messy for others to clean up after. In this blog I cover a few ways to clean out your scene and address final touches to the asset like naming conventions
Checking for Ngons
Ngons are faces with more than 4 sides. Depending on what you are doing you can technically get away with Ngons but i don't really like to do this. Also some pipelines have checkers that will flag for ngons when you check in to the pipeline.
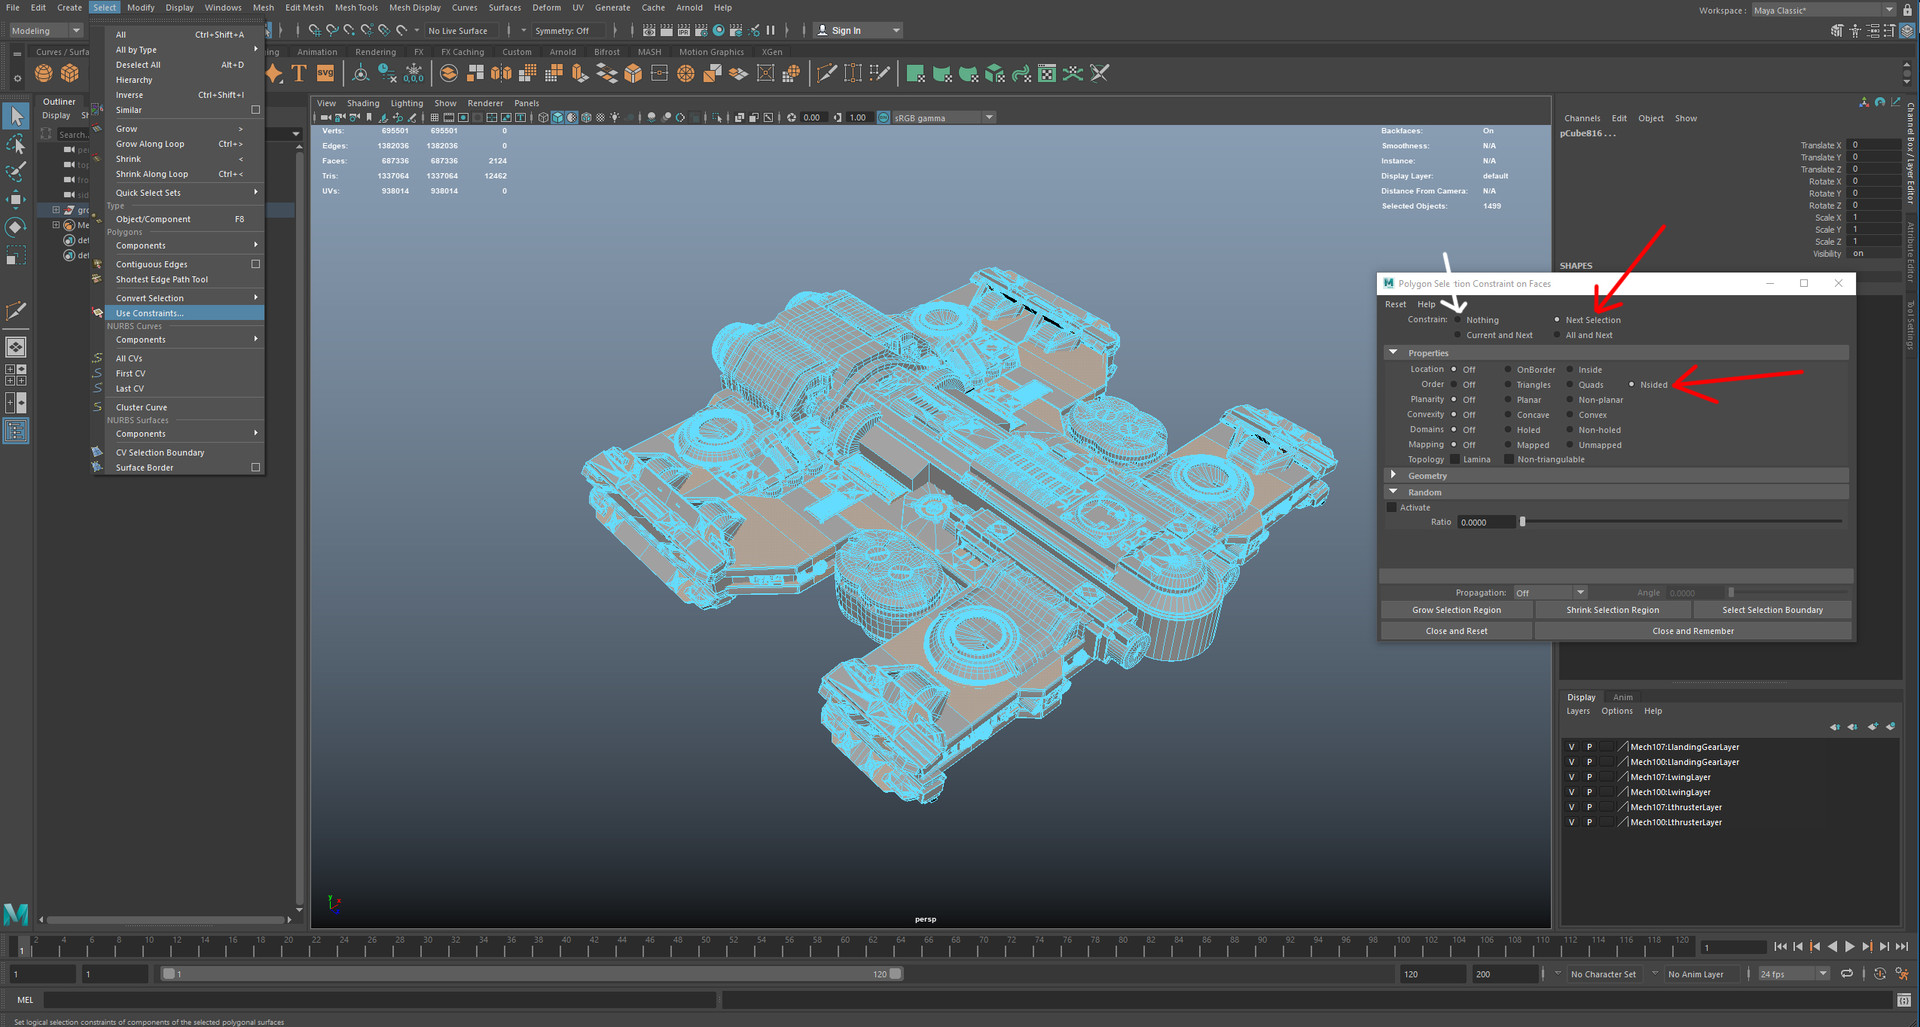
A quick and easy way to do this is to just select your whole model and press F11 which will put you in to face mode. Go Select > Use Constraints and open this menu. Depending on what mode you are in different options will show. Click Next Selection option and Nsided, then just drag over your model. Any faces with more than 4 sides will be selected and you can deal with them how you need to. Usually if I have some Ngons at the end it is usually in places I never really noticed and not visible. A trick I use is I just go Mesh > Triangulate with the Ngon faces still selected.
Once you are done don't forget to reclick the “nothing” constraint option before closing the constraint options. If you dont you will realize you can't select faces later.
Assign Shaders
This will entirely depend on the studio. Some just require a default Lambert shader to be applied to everything before it is checked in. Other studios however require the materials to be set here. To do this just assign shaders based on what material the geometry is and name them accordingly. This allows other artists that pick up the asset to know exactly what materials are used and make selections based on it.
Personally when I work I make shaders based on the materials just so I am not looking at grey models all day., even if i have to put default lambert on at the end anyway.
Deleting Extra Materials
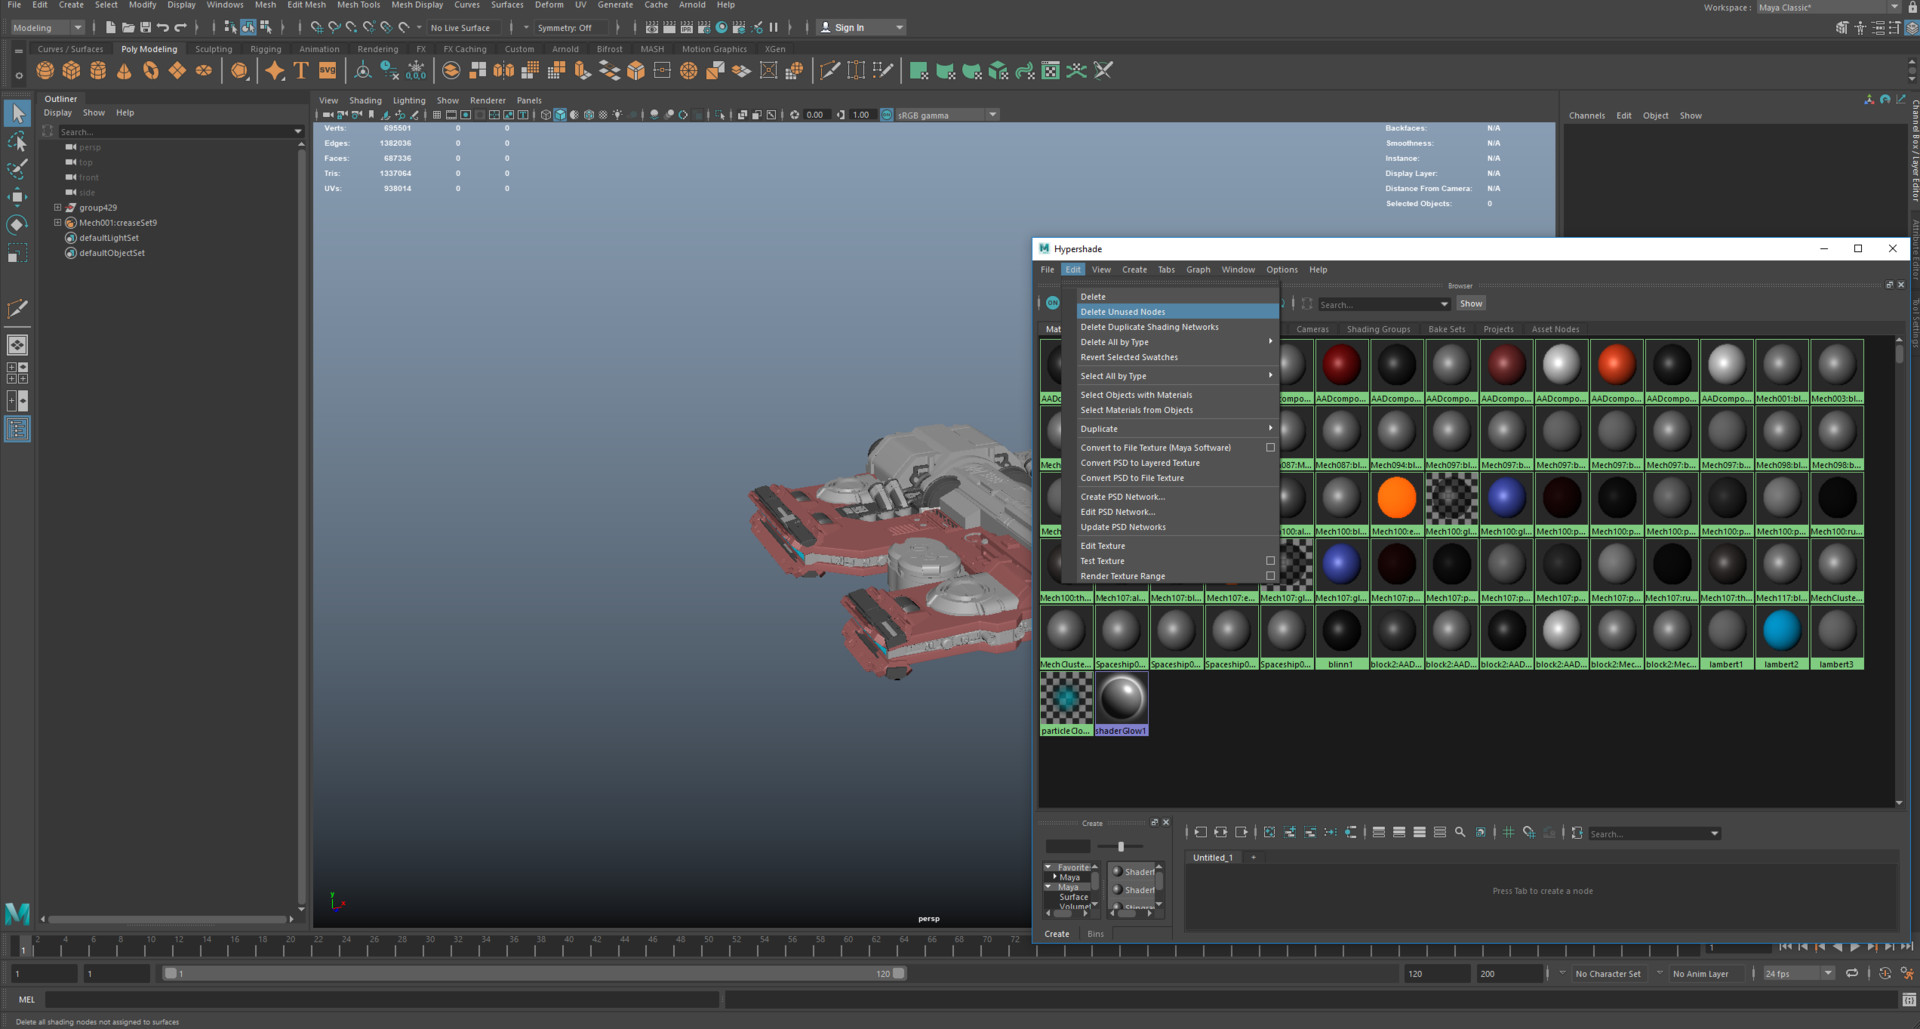
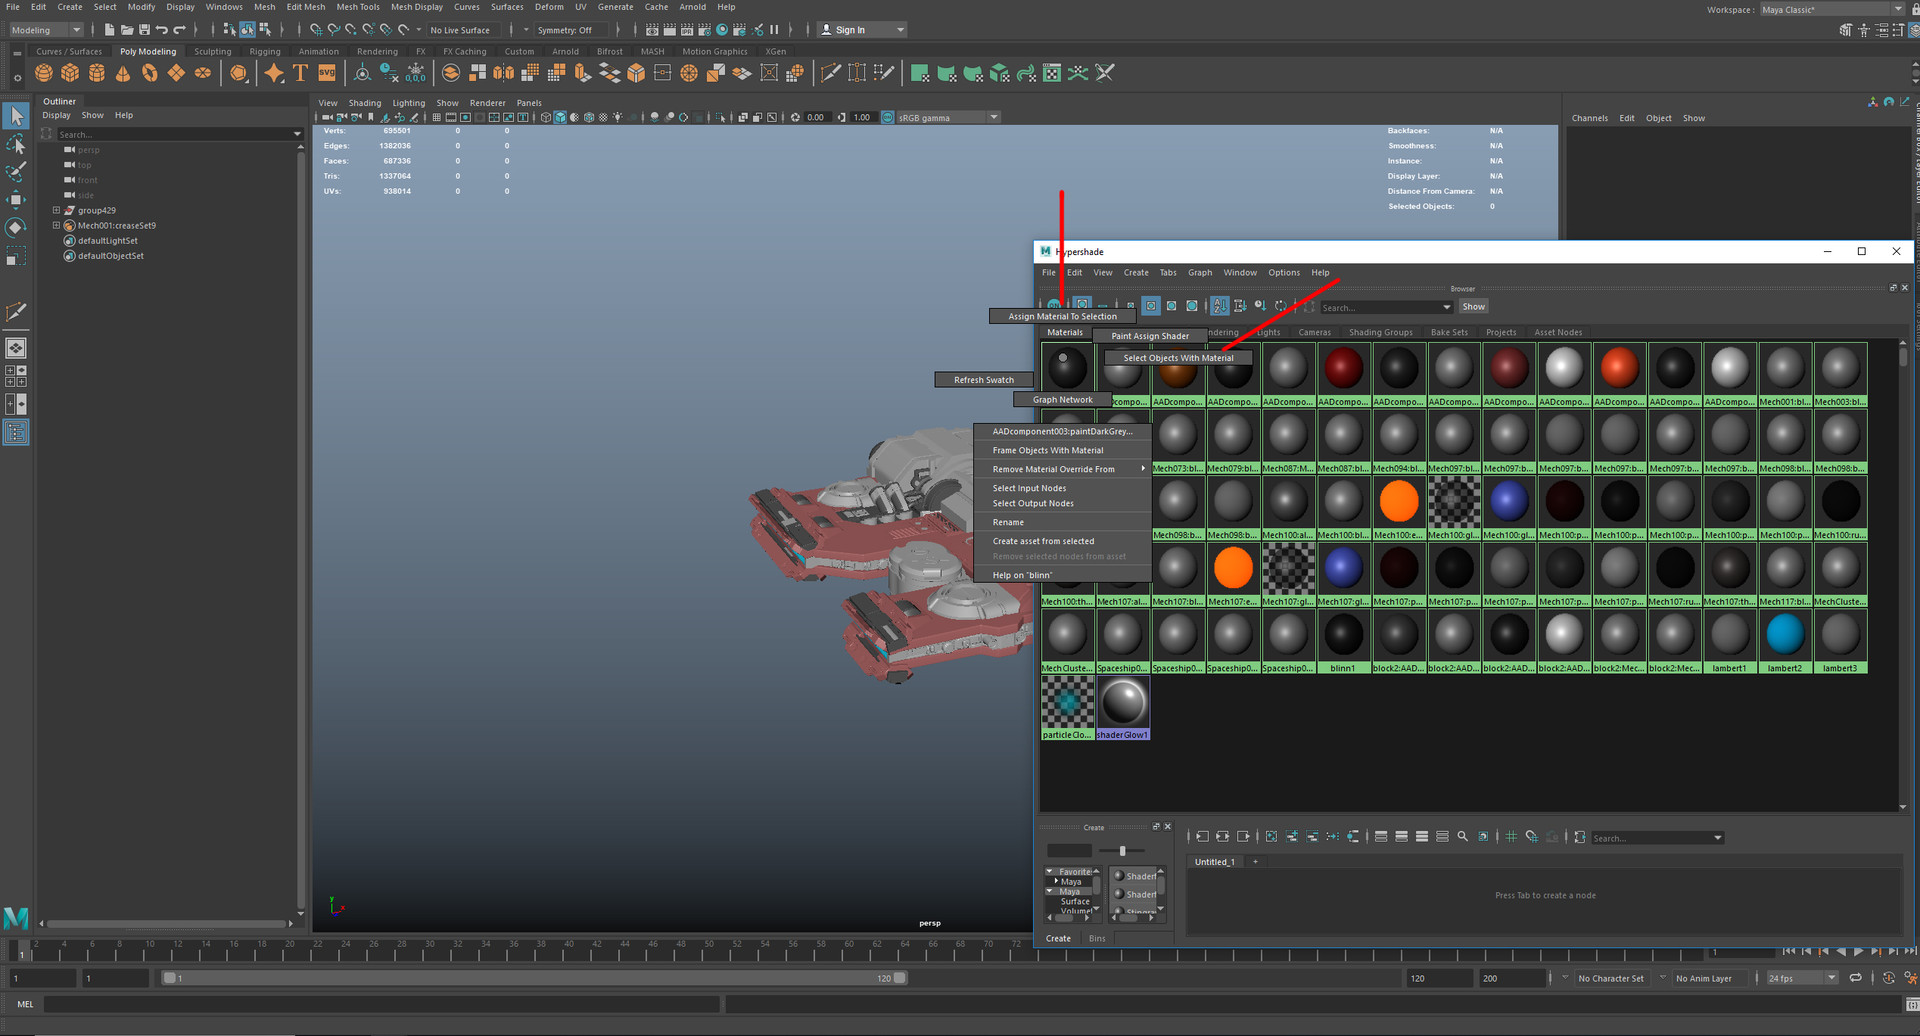
If you have been throwing shaders around everywhere and importing other scenes and models etc, you will end up with a lot of random unused shaders in your scene. This is super simple to fix though. Just open your Hypershade and go Edit > Delete Unused Nodes. Here you can also consolidate a lot of the shaders if you have duplicates. If you have like 4 glass shaders when in reality you only need one. Just hold right click on each shader you need and go Select Objects With Material. Hold right click on your shader you want to use and go Assign Material to Selection. Once you have consolidated all your shaders you can just use the Delete Unused Nodes again.
This is quite important to do because if you hand off this scene with like 40 random shaders in it and someone imports your scene, they will have to clean it all out themselves later.
Naming convention
A naming convention is just a standard that is used throughout a studio for naming things. Every studio has its own unique naming standards. The reason this is fundamental is because it keeps everything organized and easy to find across all shows, also there are a lot of automated processes that rely on the naming to be correct. Camel casing is always used as you cant have spaces in Maya and underscores break up the different elements of the name. You can never have two pieces with the exact same name, this is very important in a studio. I will list below a basic example of a naming convention
r_wingPanels_grp
- r_wingPanel003_MSDM_geo
The first part is almost always what side the piece or group is L - Left, R - Right, C - Center.
The main chunk of the name is the description of what it is which is usually based on what comes before it, as you cant have duplicate names this helps a lot instead of just having lots of bolt001 in lots of different groups. Instead you will have for example wingBolt01, fuselageBolt01 etc. The next part is used if you dont apply shaders to the model, you put the materials in the name so M - Metal, W - wood etc. The SDM part stands for subdivided or not so you would use something like PLY if it doesn't need to be subvdivided. The final suffix is always what it is, a group or geometry.
This isnt set in stone, this is just a made up example so every studio will have its own way of doing things. Below is a different example but pretty much the same thing.

Removing namespaces
A namespace is something that occurs when you import something in to your current scene. The namespace is usually the name of the file that sits in front of everything you import. Geometry, shaders, everything. Like mentioned above with the shaders, if you dont clear these out and someone imports your file, they are going to get all your extra namespaces too. Namespaces in general should be cleared out of an asset.
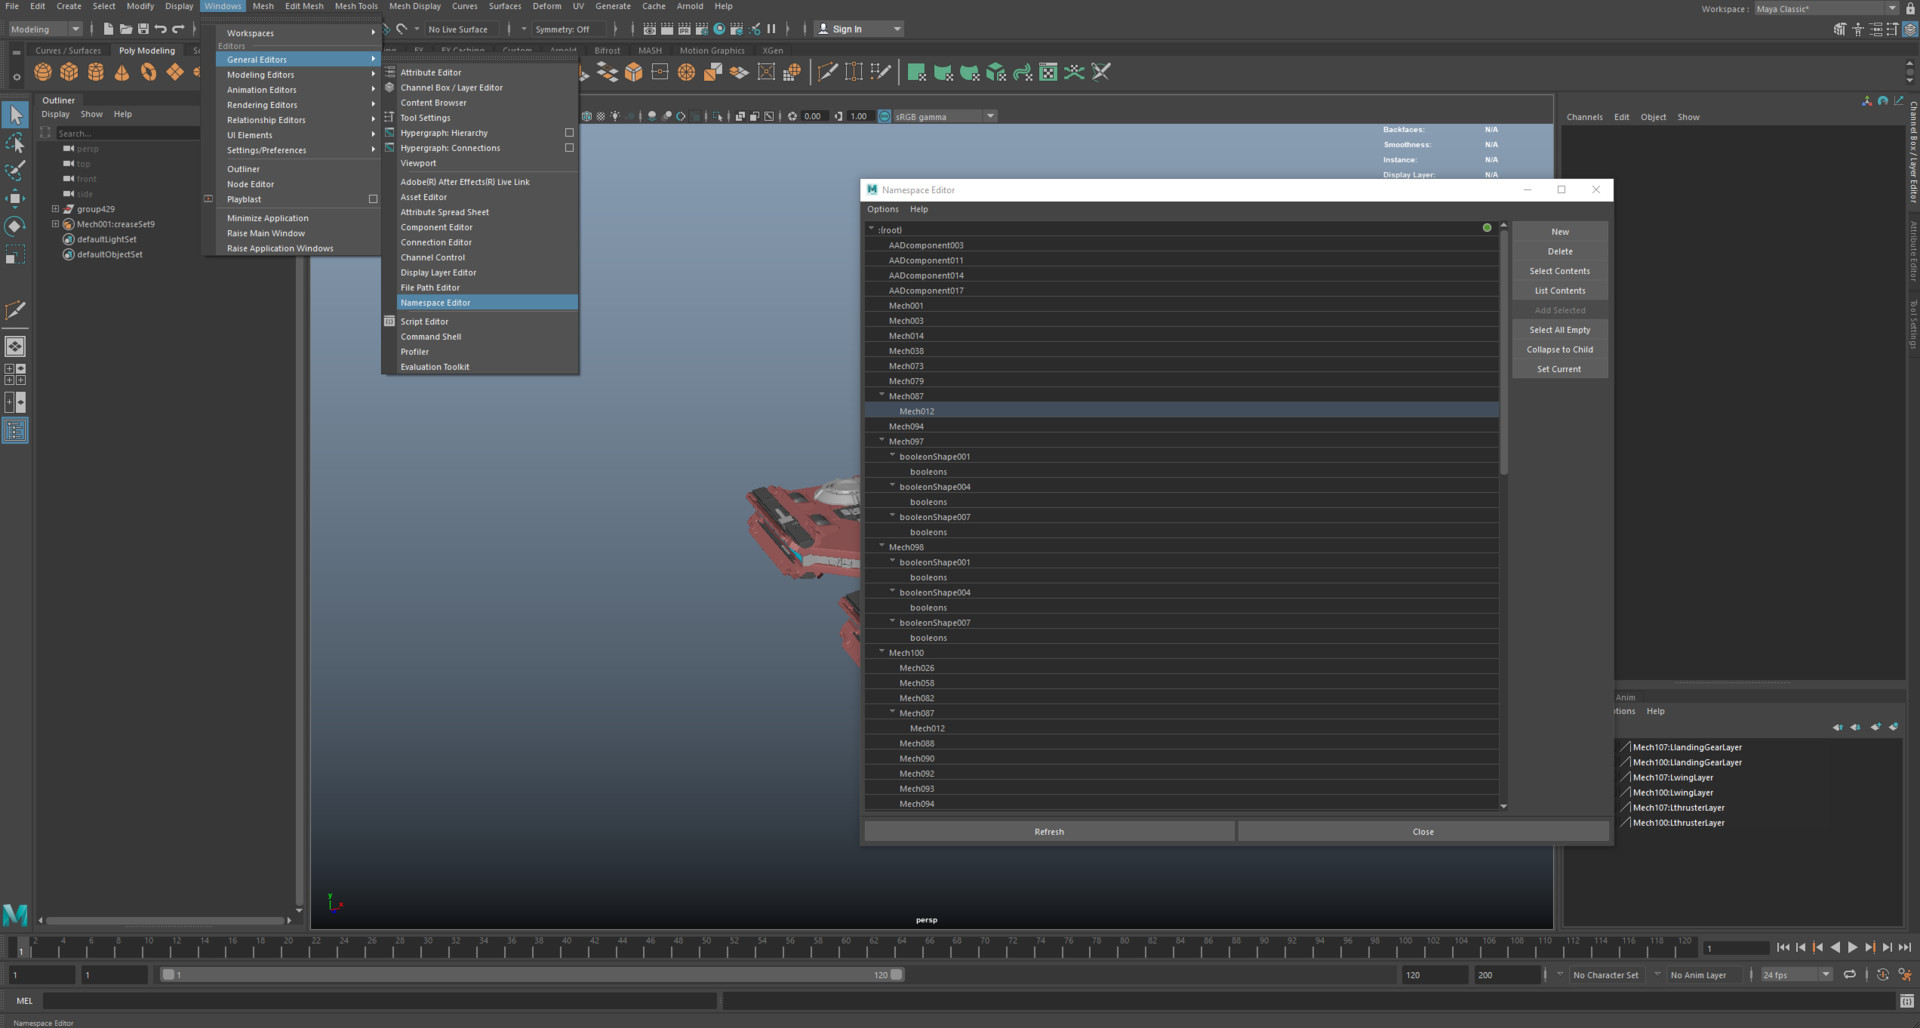
To do this go Windows > General Editor > Namespace Editor. Here you will find sort of like a tree system, you can have namespaces within namespaces etc and it can get very messy. Unfortunately you cannot delete a namespace that holds other namespaces so you need to start from the bottom of each “tree”. To do this select each namespace you want and press delete and you will get some options. Use Merge with Root, ultimately that's what we want to do, go back to the root of the scene. Don't press delete in this section or it will delete the mesh that the namespace is applied to.
This can be quite tedious but it is good to fix. Namespaces you can't get rid of though are references.
Deleting History
Every single time you modify a piece of geometry it will have history that can be updated later. Maya History is terrible so don't touch it unless it is the last thing done to the object. You can find the history for an object in the Channel Box.
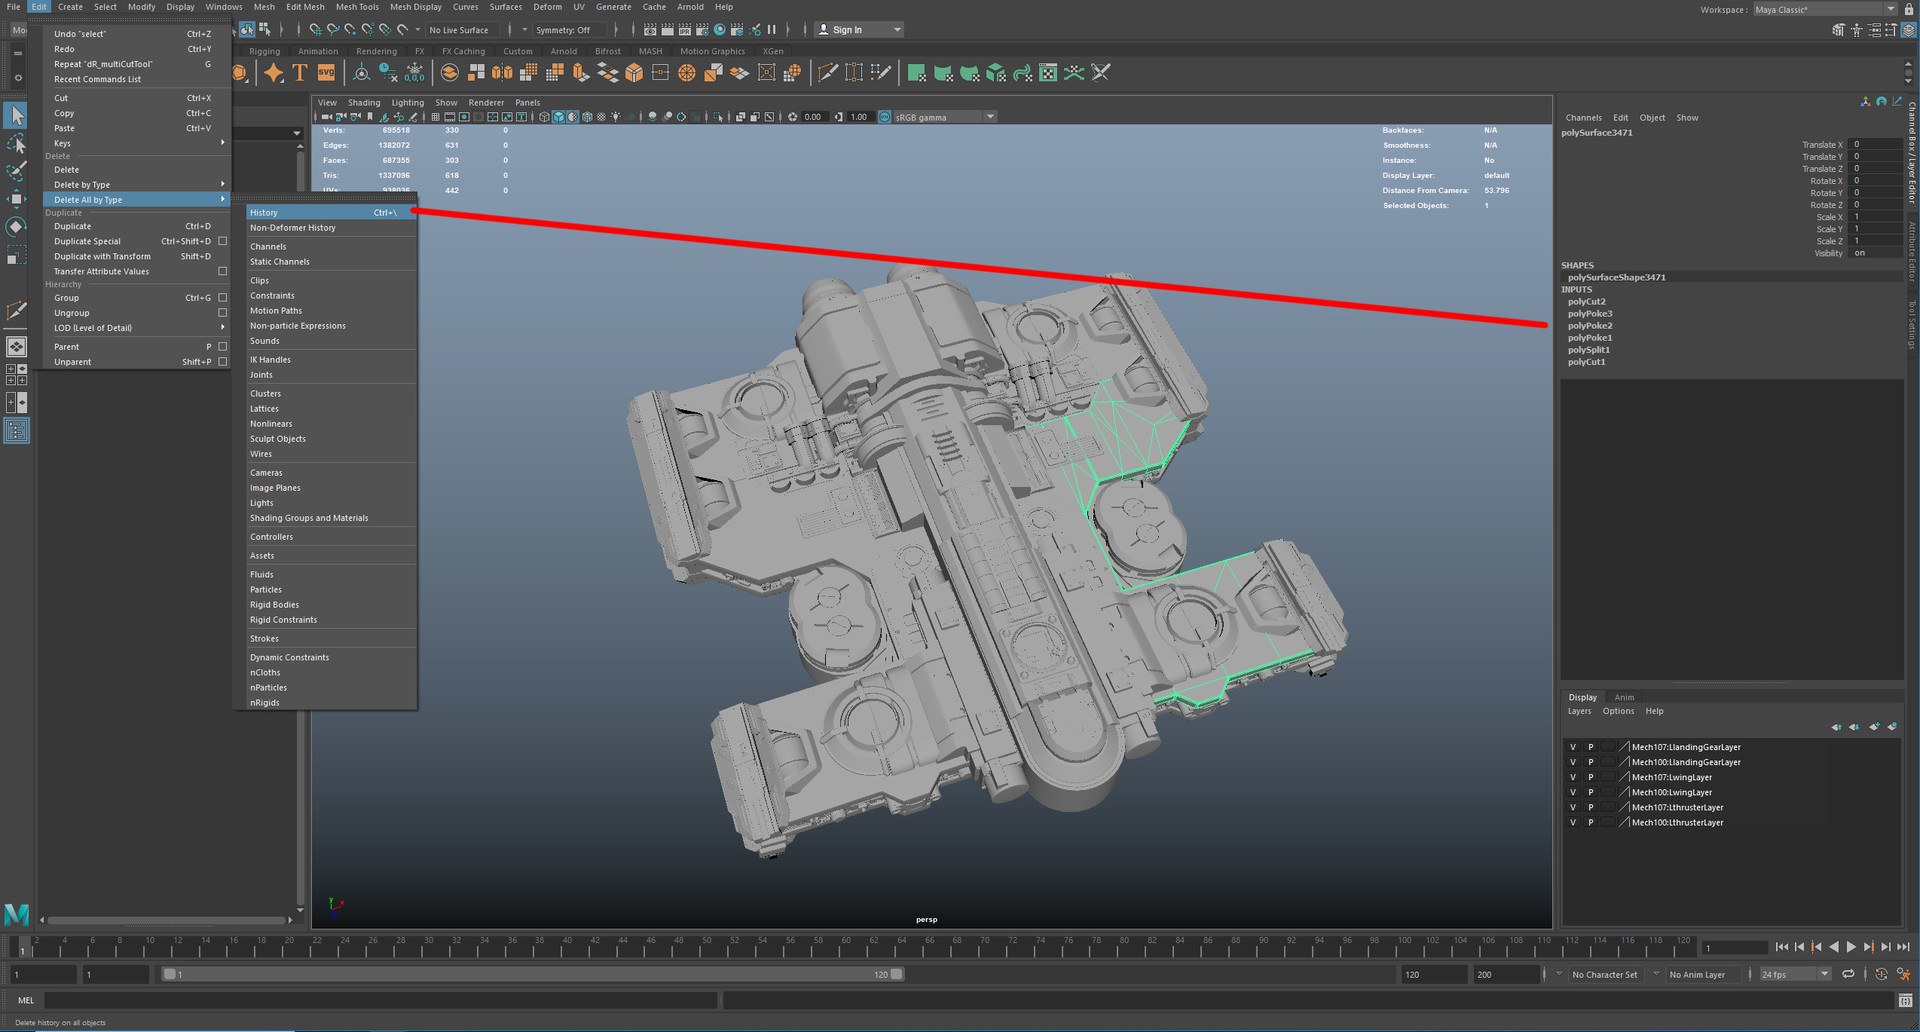
It is best to delete your history while working because it can slow down your scene, especially with how pointless i find Maya’s history. I usually use Edit > Delete All By Type > History. This will completely wipe the history from all objects in the scene. Only do this if you really want to. If you want to just do specific selected objects just use the option above Delete All.
Once the asset is finished though all history should be deleted from the scene though, everything should be final.
Freeze Transforms and Reset Pivots
Transforms are the location the object or group is in 3D space, these can be found in the Channel Box. They will be based on the Pivot of each object. For example you can move all the verts of an object around in 3D space visually but you will see the transforms wont change as the pivot itself isn't moving.
When we finish an asset everything should be Zero and nothing should be negative. To do this just select the objects or groups you need and go Modify > Freeze Transformations.
We also need to move the pivot of each object. Depending on what studio you are in, some you need to center the pivot and some you need to reset it. Center pivot will put the pivot at the middle of every single piece of geometry individually. Reset pivot will put the pivot of every group or object at the Origin, at 0,0,0. Make sure if you are resetting the pivot that you have frozen transformations first or it will alter your geometry. You can center the pivot whenever you wish though and I do it quite a lot while working.
Optimize Scene
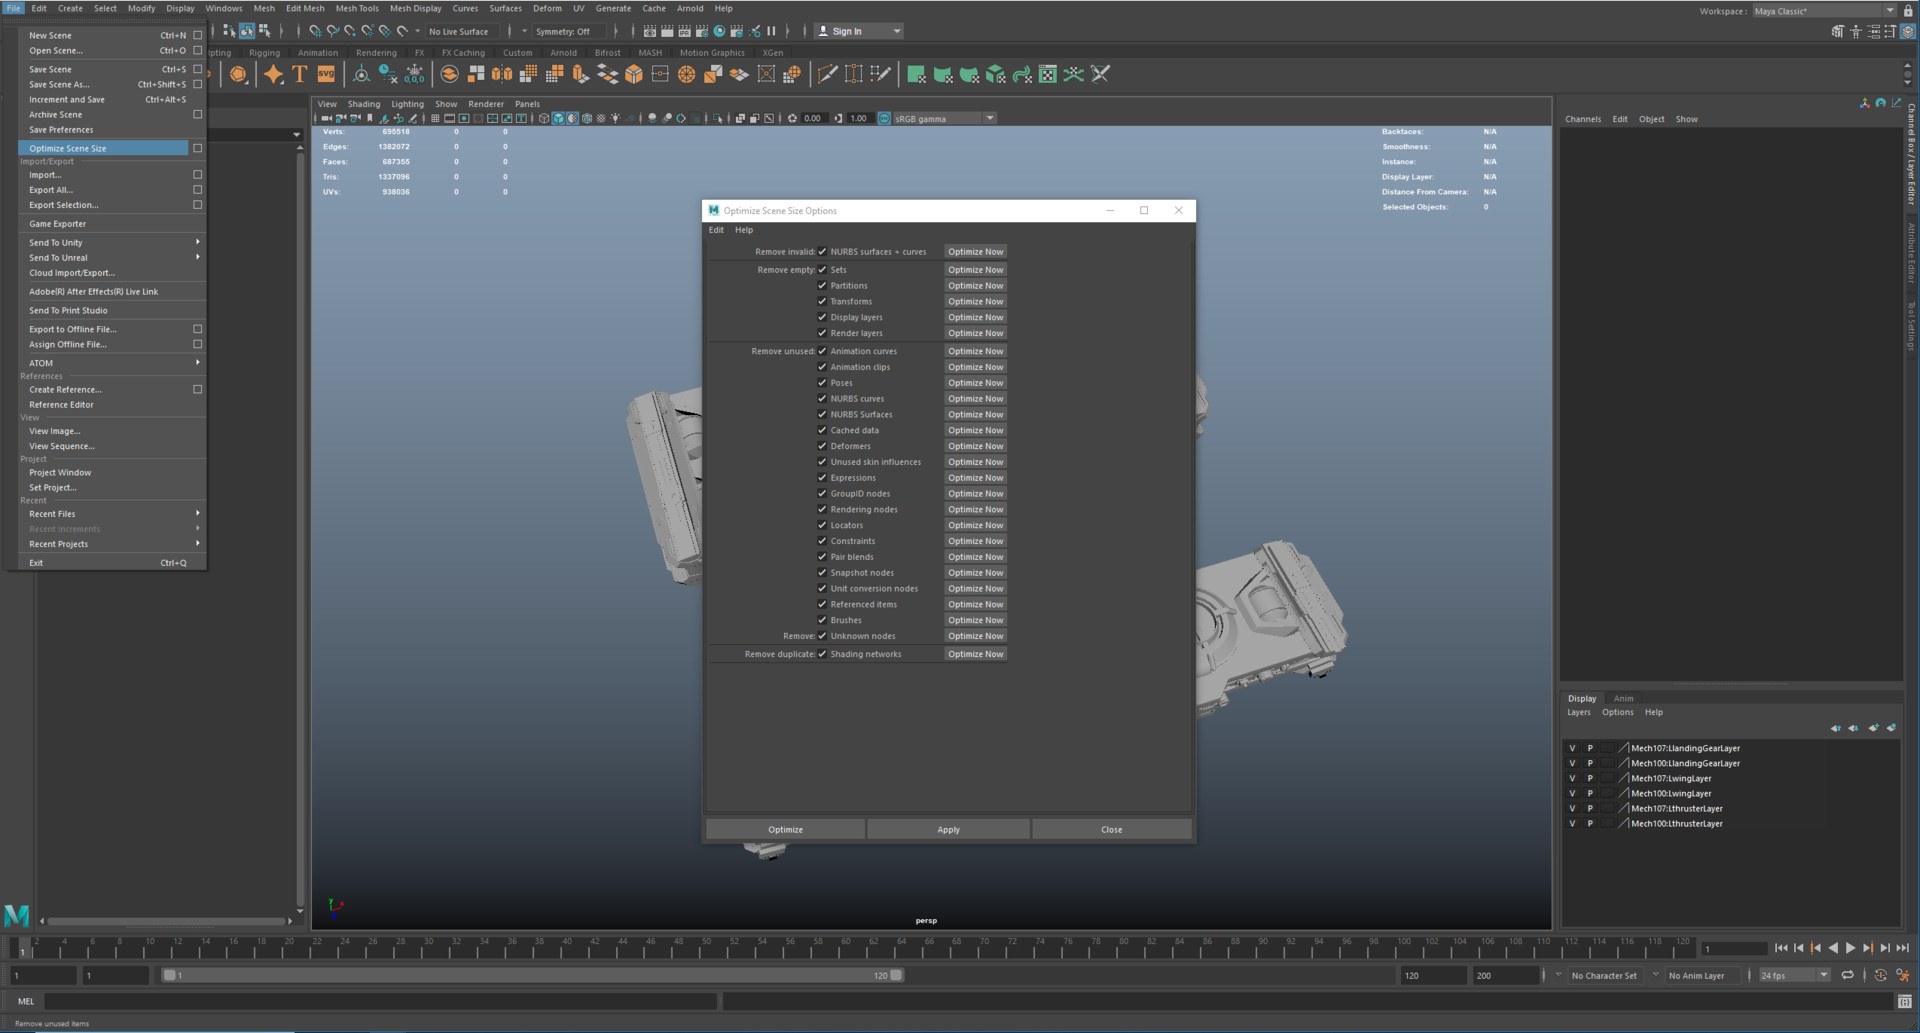
Optimize scene is a good last final clean out of lots of random hidden things. Make sure you are doing this once you are finished or make a copy of the file first because you cant undo this. You can find it under File > Optimize Scene Size. Open the options box to manually pick and choose things you want to remove. When I am done I usually just remove every option there though.
What Happens Now
Once your asset is all clean and passes all the checks, off in to the pipeline it goes. At this point everyone involved will usually get an email saying you have checked it in but don't rely on that. Message your production and let them know its out and talk to the next artist picking up the work. Communication is super important in the industry so go let the right people know it is ready for pick up. After that is done, get your next task and repeat the process.
Well that is my first 5 blogs covering the basics of modeling in production. These are the things I think about on a daily basis working on the biggest films. This is just a general over view of production, there are a few more things I would like to go in to more in smaller blogs dedicated to very specific things. If you like this sort of stuff and have found it helpful share it around. Comment below if there is something specific you would like me to talk about.